How to Create a Custom Section in Shopify
Creating and adding custom sections in Shopify is without a doubt the building blocks to building or extending themes.
When done correctly you’ll have at power at your fingertips to venture off and build custom sections to improve long-term maintenance, integrate with third-party services, create seamless flows, and much more.
Below, we’ll briefly cover our understanding of Shopify sections, and what they can be used for. After that, we’ll look at how to create a custom section.
Shopify tutorials:
- How to change collection URL in Shopify
- How to add a product to Shopify the right way
- How to create a drop-down menu in Shopify
- How to create a collection in Shopify
- How to add a blog to Shopify
- How to add meta tags to Shopify
- How to remove powered by Shopify
- How to add users to Shopify
- How to add a logo to Shopify
- How to edit the order confirmation email in Shopify
- How to turn off the Shopify abandoned cart email
- How to hide products on Shopify
- How to duplicate your Shopify theme
- How to add custom CSS in Shopify
- How to add an order fulfillment center to Shopify
What are Shopify Sections?
Shopify sections are liquid files that give you the ability to add or extend functionality in any given theme. Think of them as “components”, or “modules”. Each page can have multiple modules(sections).
Shopify sections should be reusable in nature and serve one purpose, whether that be a payment section or a section that injects new functionality into your Shopify store.
What can Shopify Sections be used for?
Understanding what Shopify sections can be used for seems to be a tough one to digest for many. But let’s look at what out-of-the-box themes use them for, and then we’ll look at them from a custom section perspective.
In the ordinary existing theme world, a Shopify theme has a minimum of 24 sections, and each section has one responsibility and is reusable in nature.
Below, is an image of the code editor with many sections, including the footer.liquid section. We'll use the footer.liquid section to try and explain why sections are important and what they can be used for.

Imagine you create a new page without the footer section existing. What would you do? You’d simply create a custom HTML footer and add it directly to the page, right?...
What happens when you create another page that requires a footer? It’s fair to say, you’d probably copy the footer from the previously created page. Which means for every new page you'd replicate the process.
You can see the pattern right? It becomes maintenance hell.
What happens if you’ve been informed that one of the social links is broken in the footer? You’d have to go through each page and fix it. Maintenance hell.
At this point you’re probably wondering, “well, why don’t we just add the footer to the main theme file? this will allow all descendants to inherit the footer”.
Really, what you should be thinking is, what if I need pages that don’t require a footer. What if I need dynamic logic? what If I need the ability to change colors, text size, and link URLs?
With that in mind, this is why sections are used. Optional and reusable sections that can be configured.
Below we’ll cover a simple use case for what a custom Shopify section can be used for.
How to Create a Custom Section
Whether you're following along with this tutorial or you plan to create a section, ensure to always back up your Shopify theme and work within the duplicated theme.
Ok, before proceeding and to give you a little context to the tutorial, let’s assume you have multiple fulfillment centers attached to your store, but you also leverage Amazon fulfillment.
Now imagine, you have a popular product but you’ve run out of stock, except the stock is still available at an Amazon warehouse.
So, rather than lose the sale, we’re going to create a custom section that displays a link to an Amazon store when the stock is not available on your Shopify store.
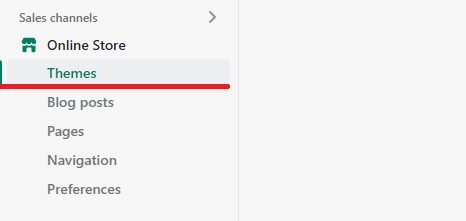
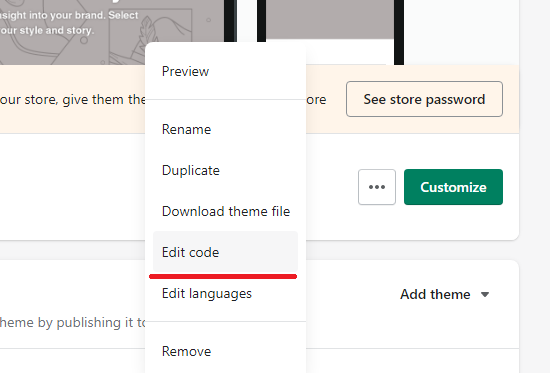
Step 2: Edit Code
Click the three dots, or "Actions", and on the dropdown that appears, click "Edit Code"
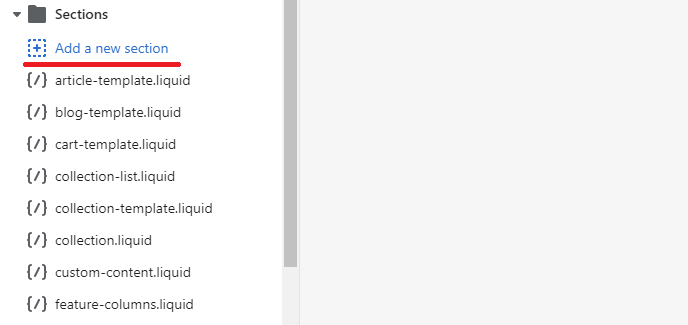
Step 3: Sections > Create Section
Navigate to "Sections" folder, click to expand, followed by clicking "Add a new section"
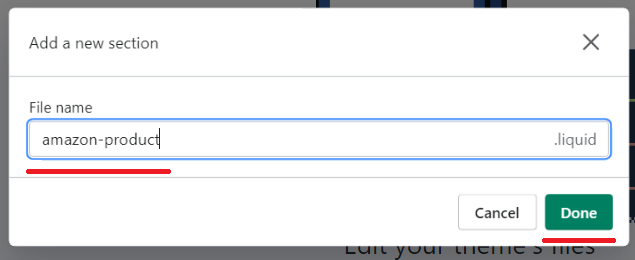
You should be presented with a popup to name the section. Add a name and click "done".
Step 4: HTML / Liquid
Ok, so we now have a new custom section file, but we need to add some liquid, and HTML for our section to render.
Aside from the HTML, which is self-explanatory, the liquid "is saying", "If this product is not available, and the setting for the section has a value, render this HTML."
{% schema %}
  {
    "name": {
      "en":"Amazon Product"
    },
    "settings": [ {
            "type": "text",
            "id": "amazon_link",
            "label": {
              "en": "Amazon Link"
            }
        }
    ]
  }
{% endschema %}
{% if product.available == false and section.settings.amazon_link != blank  %}
                                <div class="product-template__container page-width amazon-link-container">
                                <p>This product is no longer in stock, but you can view our range on Amazon.</p>
                                <a href="{{ section.settings.amazon_link }}" title="Go to Amazon" target="_blank">Go to Amazon</a>
</div>
{% endif %}
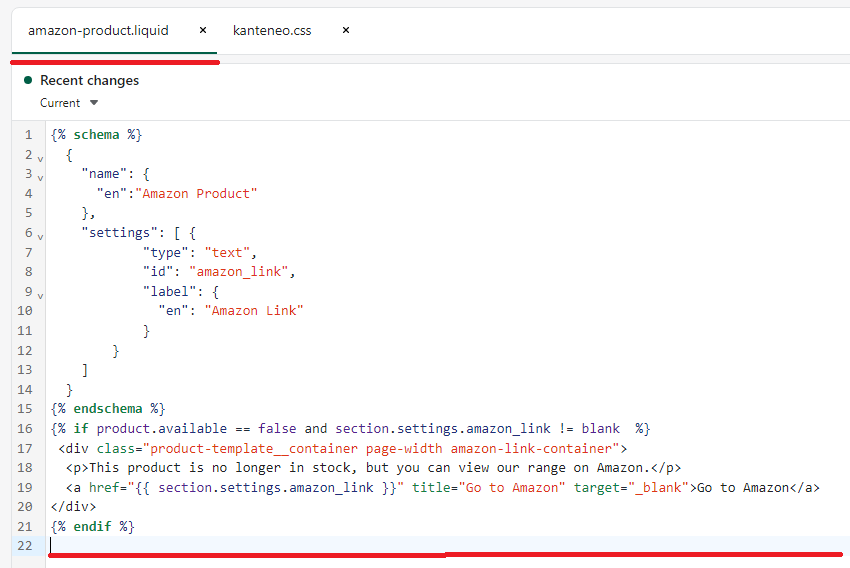
Outside of the HTML/Liquid you'll need to pay close attention to the "settings" collection within the JSON. Adding a property to this, is how we render an input field within theme editor.
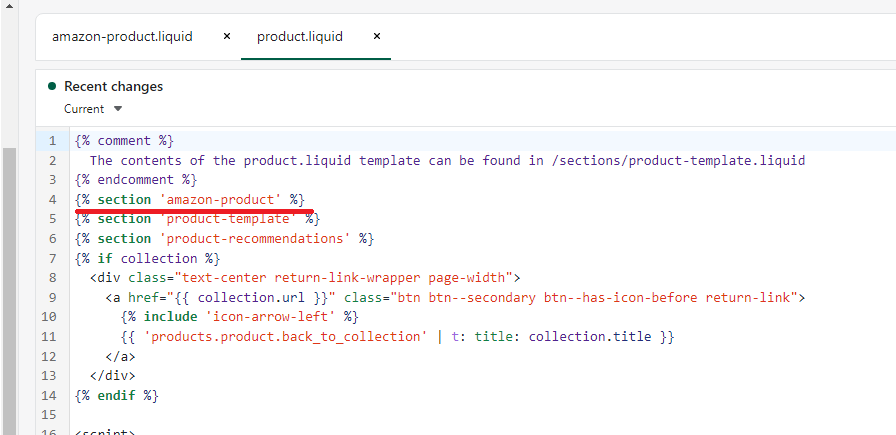
Before, we move on we need to ensure that the logic actually triggers, meaning we have a section but the section is not added to a template.
We know that when a product is not available, we want to display a message on the product page, thus we need to go back to the code editor, find the product template, and add a reference to the new section.
{% section 'amazon-product' %}
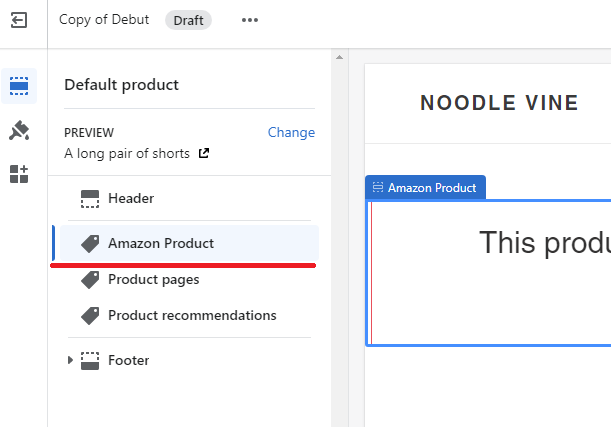
Step 5: Theme > Customize
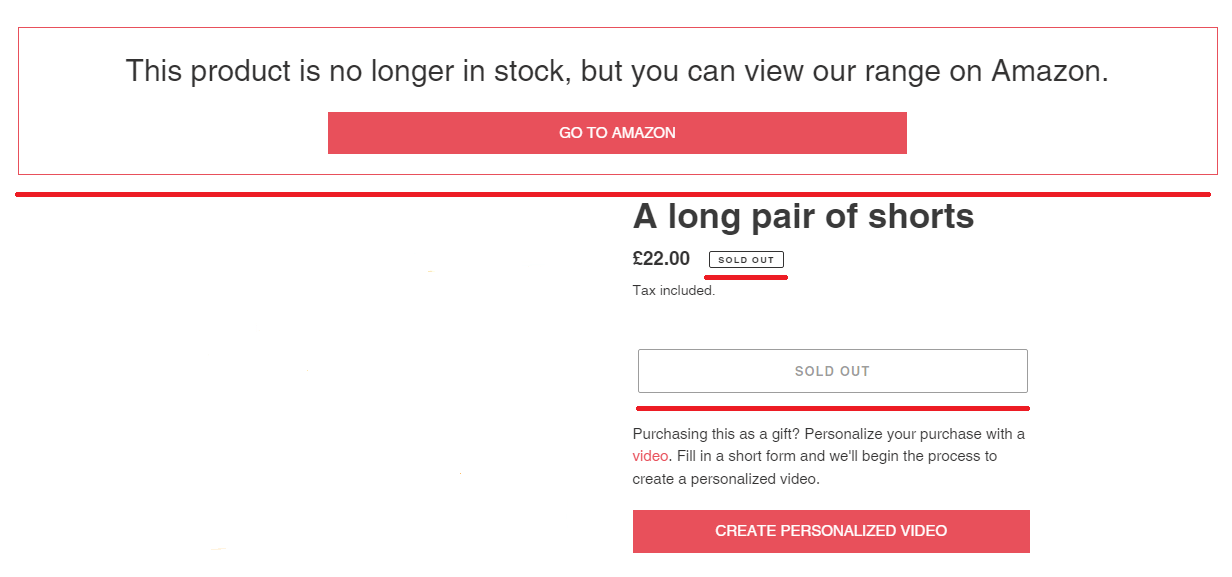
At this point, we've created our custom section, added a reference to it, now we need to set the product to unavailable, we did this by setting the product to out of stock, meaning setting the inventory quantity to zero.
Now go to the theme editor > Online Store > Themes > Customize and select product from the dropdown to edit the product page.
You should now see a new tab/button, in this case it's our "Amazon Product". Click the new tab.
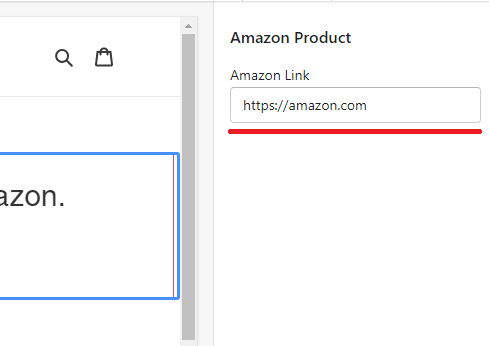
As previously stated, the settings JSON from our custom section creates a new input field. For this example we simply added a link direct to Amazon.
Step 6: Success
If you've followed along with tutorial, or some variation, go to your store front and confirm the changes.
To Note: Whilst adding a CSS File to Shopify is out of scope, we have created a dedicated blog post:
Congratulations we’ve just added a custom section with conditional logic that renders a button if an Amazon link is present.
If you’re struggling with the technical aspect, you have two options:
Teach yourself, there is no grander feeling when you understand how to modify your own store. There are many resources to learn the ins and outs of theme development, and one of them is Udemy.
 Udemy
Udemy
On the other hand, if you’d prefer to outsource, simply use Upwork to find a Shopify expert.
This has two benefits, you can start to build an outsourced technical team, and your money is protected via escrow, with a great resolution dispute system.
 Upwork
The Takeaway
Creating custom sections is a tremendous feeling, it enables you to feel connected to your Shopify store, and allows you to go beyond what the vast majority of store owners cannot do.
But having said that, it is very much acceptable to outsource. After all, if your goal is to focus on marketing, there is no point in getting stuck on implementation specifics.
To summarize we've briefly covered:
- What are Shopify sections
- What Shopify sections can be used for
- How to create a custom section in Shopify
What next:
- Learn the right way to increase traffic to your Shopify store
- Learn why you have Shopify traffic but no sales?
- Customer retention strategies to help increase revenue
- How to blog for business
- Best Shopify Themes
- Share this post, every little helps.
- Subscribe to our newsletter below for tips and tricks to help boost sales.
Additional Shopify Resources
With Shopify being one of the largest eCommerce platforms on the market means you’ll never be short of resources to learn how to build a profitable eCommerce business.
Kanteneo aims to be the best Shopify blog on the market, but you may require additional resources to help you on that journey. Below we’ve listed a top-selling Shopify book by Veronica Jeans to help you learn how to launch a profitable business.


