How to Add a Product to Shopify The Right Way
In a world where products are the prime driver to earn money online, it can also go drastically wrong! Whether a physical product or dropshipped product, many new retailers seem to add less than desirable products and photos.
The product photo is probably the most important aspect when adding a product to Shopify. You may have a great product name and description, you may be ranking on the first page in google, But if the product photo does not describe the product visually, you’ll most certainly force the user to look for alternatives.
Related blog posts:
Before looking into how to physically add a product to Shopify, Let’s look at the importance of product shots, and whether you’re adding a product that sells.
An example of bad to good:
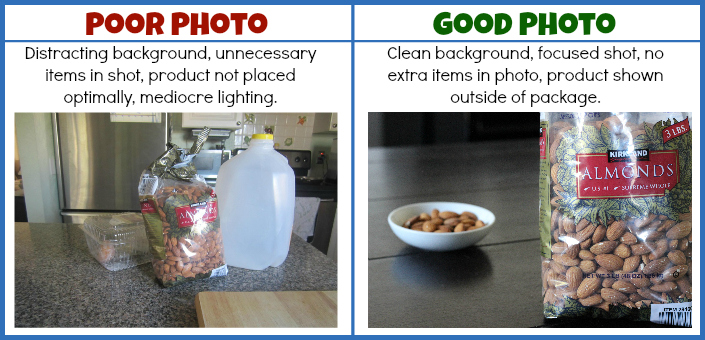
Source Product Review
Whilst the "good" photo is cleaner, and bright, it also alludes professionalism. However, it's still lacking finesse.
An example of good to outstanding:
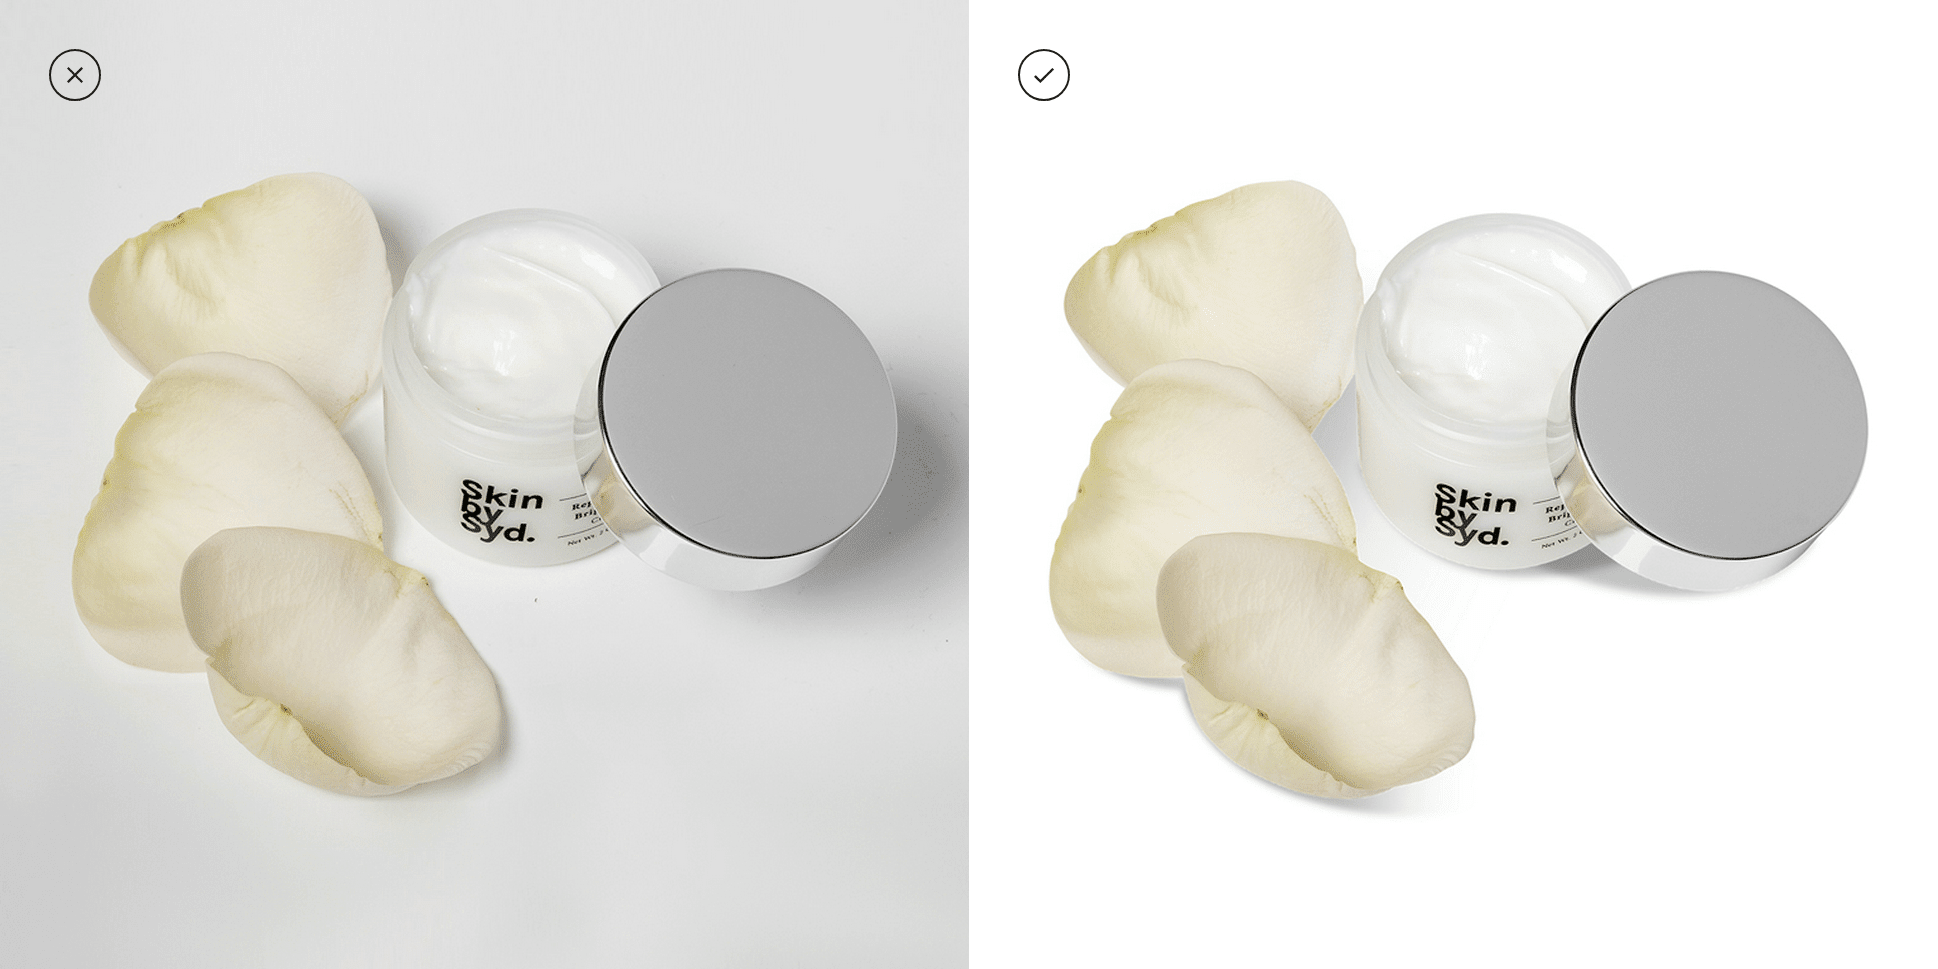
Source Photography Mistakes
Regardless of whether the left image looks good, there's still room for improvement. The ideal product shot should be to remove any unnecessary background that does not improve the product.
Test The Demand First
We cannot state this enough! You really want to test the demand first - physical or dropshipped product.
Whilst it’s easy to add a product to Shopify, not all succeed.
Why? Because most lack the understanding of current trends, and what the customer values.
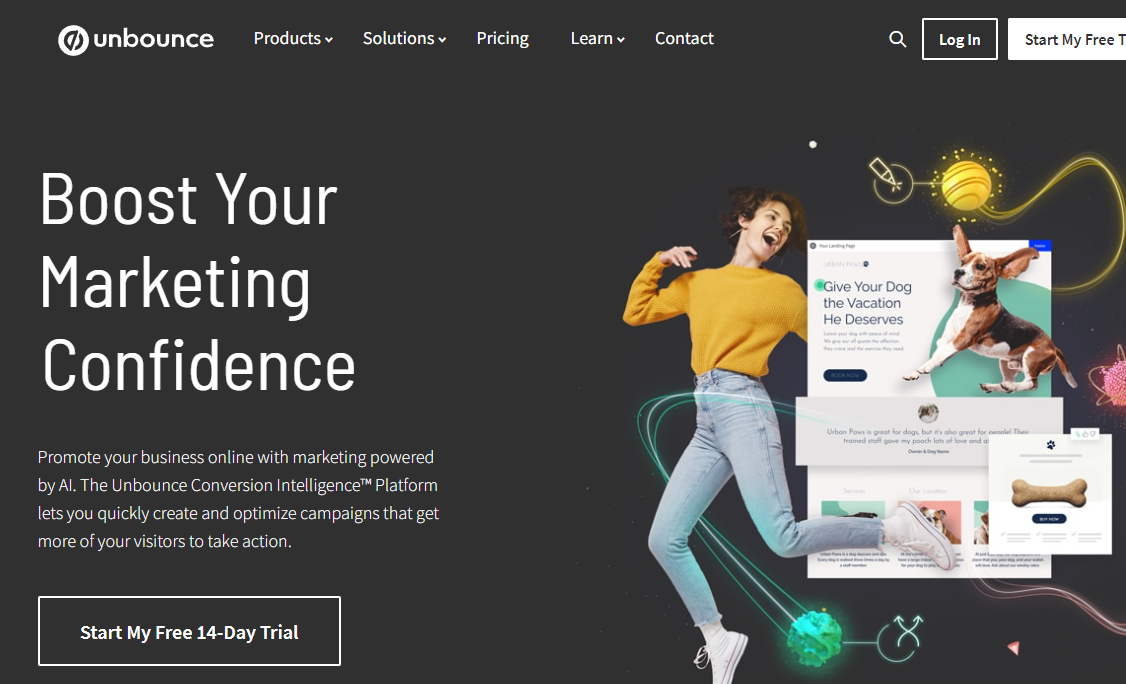
Testing demand could form part of creating pre-launch interest or using a landing page like Unbounce and a Facebook ad.
The most common approach is to create a separately hosted landing page and a Facebook ad. You’ll be able to identify whether the product being added will be a profitable one. After all, an online business is to make money and provide products that a customer actually wants.
 Unbounce
Take Multiple Product Shots
Another one that can not be stated enough! Imagine yourself looking for a new camera, you go to Amazon or an independent store, but before making a purchase you’ll find yourself scanning the photos, and reading reviews.
The potential customer wants to understand as much as they can about the product before deciding to make a purchase - it’s estimated that a customer will return to an online store up to 3 times before making a decision.
It’s extremely important that the first impression is a great one! Put yourself in the customers’ position, how many photos would you like to see when looking to purchase a product?!
When taking multiple shots try to take photos from multiple angles, and zoom in for any area of a product that may need to be explained visually.
An Example of multiple product shots:
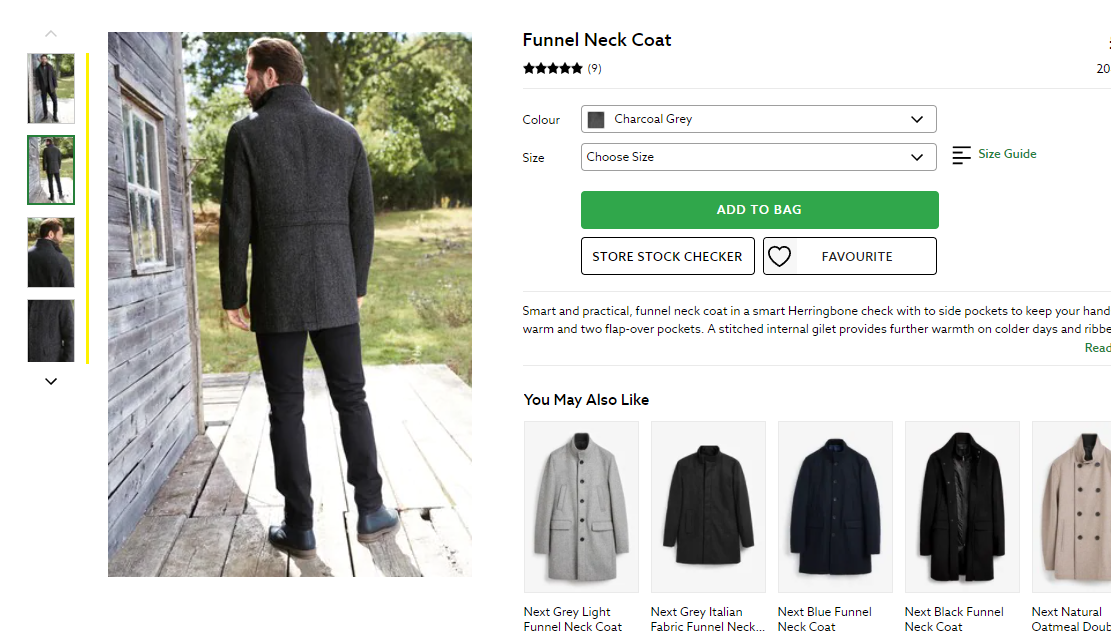
Photo Consistency (Landscape or Portrait)
Is it obvious? Well, we assume so, but it’s not. Many fly-by popup stores seem to care very little about the consistency, or simply don’t understand that images, photos, and layout plays a vital role.
When taking product photos, always stick to that same orientation (portrait or landscape).
Think about it, or rather, visit major brands! Do your research and understand the importance of consistency.
Take BooHoo for example, the consistency and quality are phenomenal. Always strive to do more, go beyond what you’ve been taught by fake gurus, or what you’ve read to quickly get your online store live.
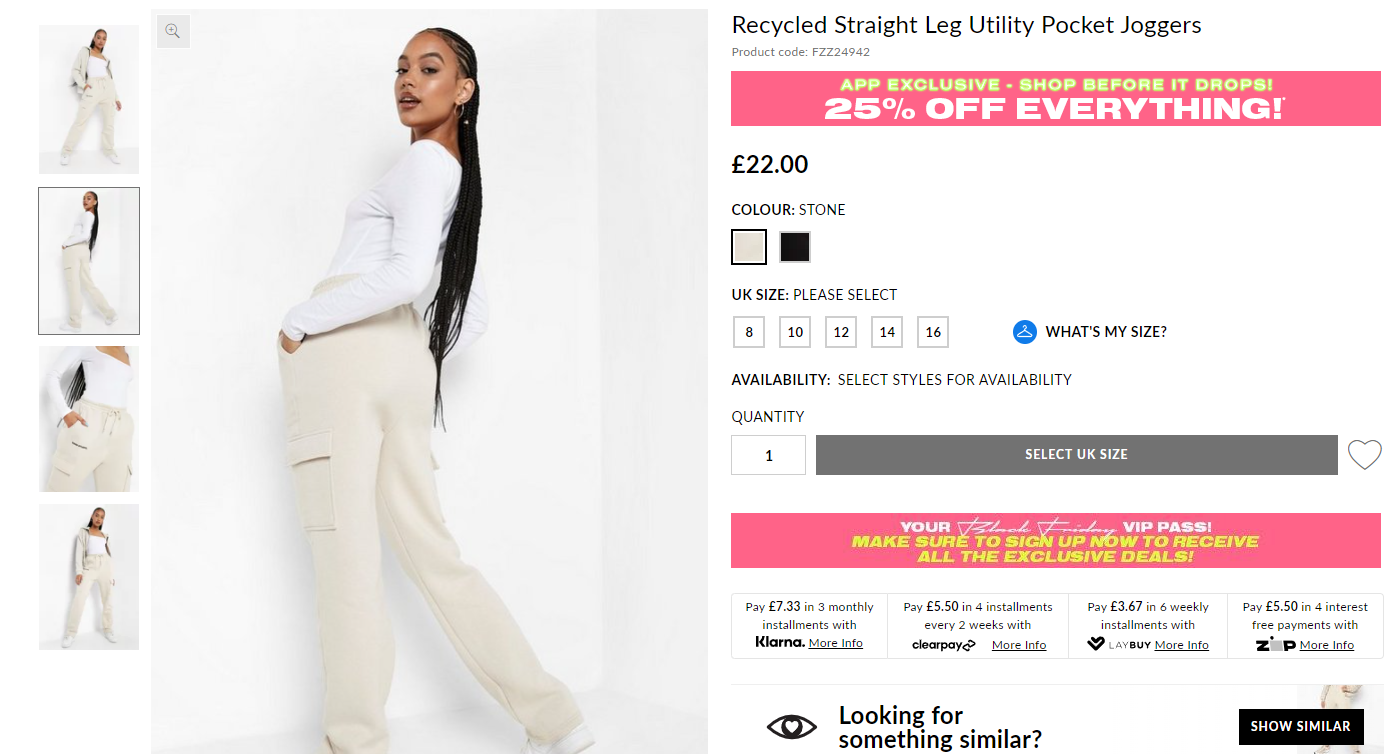
Every major brand takes the time to ensure all photos/images are consistent and are of outstanding quality.
Taking The Perfect Product Shot
Taking the perfect product shot does not need to be an expensive one. You don’t need the latest and greatest camera.
Using your mobile/handheld device should be suitable. However, sourcing a lightbox is quite essential. Google “Amazon Lightbox” for a listing of lightboxes. There are plenty to choose from for all budgets.
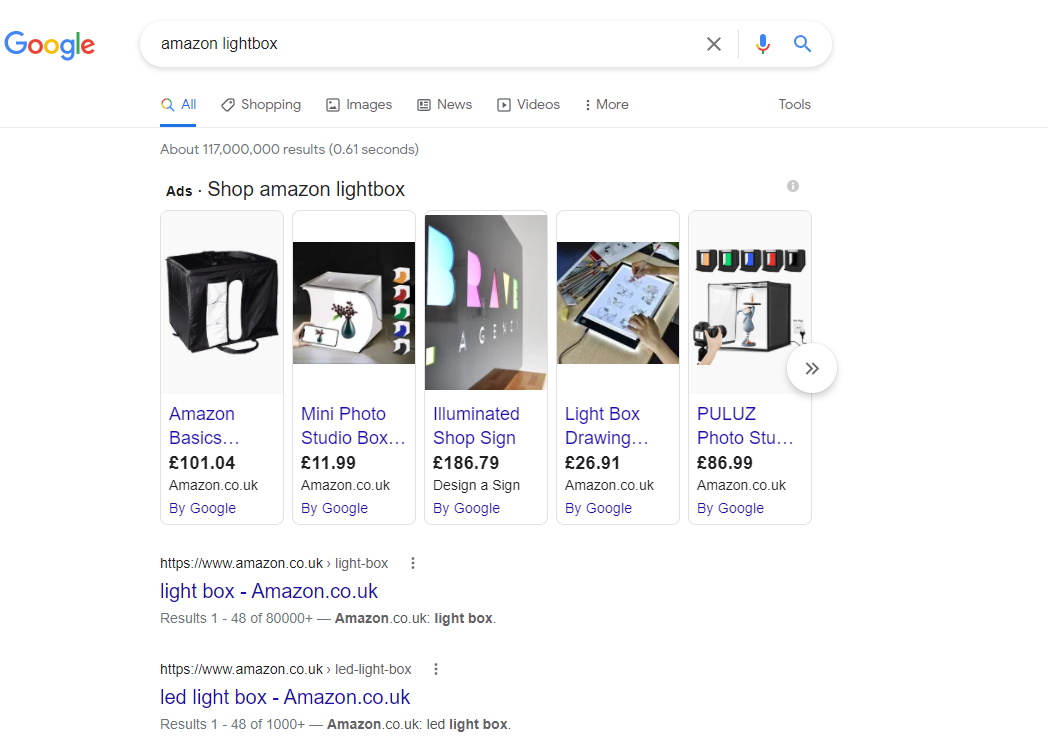
Shots to consider:
- Front
- Rear
- Left
- Right
- Bird’s eye view
- Angled
- Detailed (Zoomed in)
- Component (All accessories of product)
- Group - amongst other products
Be creative, but ensure the quality, and the shot contains enough visual elements to explain the product.
Create Pre-Launch Interest
Outside of creating a landing page, and a Facebook ad, leverage the power of social media and email marketing to create pre-release interest.
The goal is to get sales in the first few days of launching. Be proactive, engage, and delight.
You may also consider sending the product to be reviewed by an influencer for free.
Feedback, feedback, and more feedback! Whatever can be measured, can reveal trends, potential success, and highlighting potential failures.
Go on get to it, measure the demand, and determine whether it’s worth adding the product to Shopify or not.
Try out Tailwind to make life a little easier when scheduling posts. Schedule multiple posts to run over a few days and measure the impact.
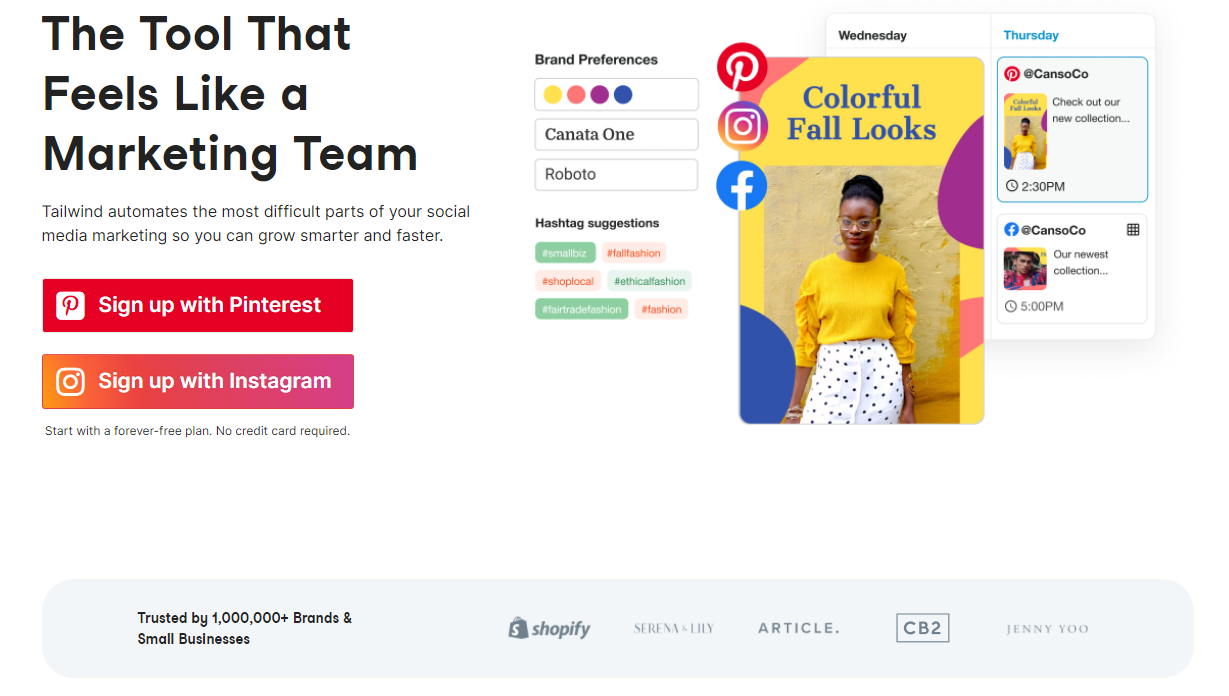 Tailwind App
Steps To Add a Product To Shopify
1, Login
If you are not logged in, navigate to your admin login page and log in.
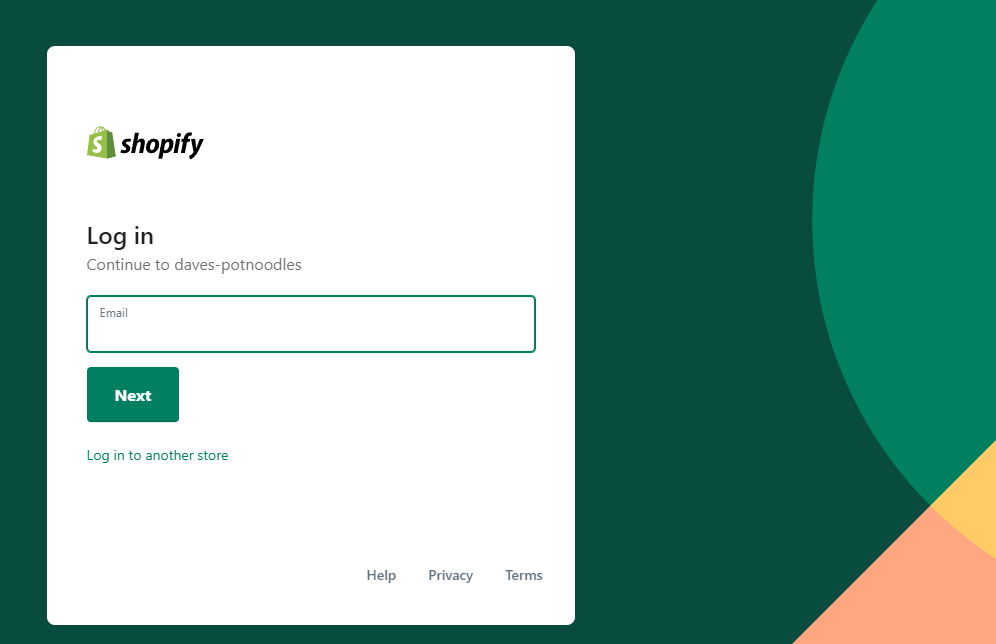
Shopify URL structure: https://{name}.myshopify.com/admin/
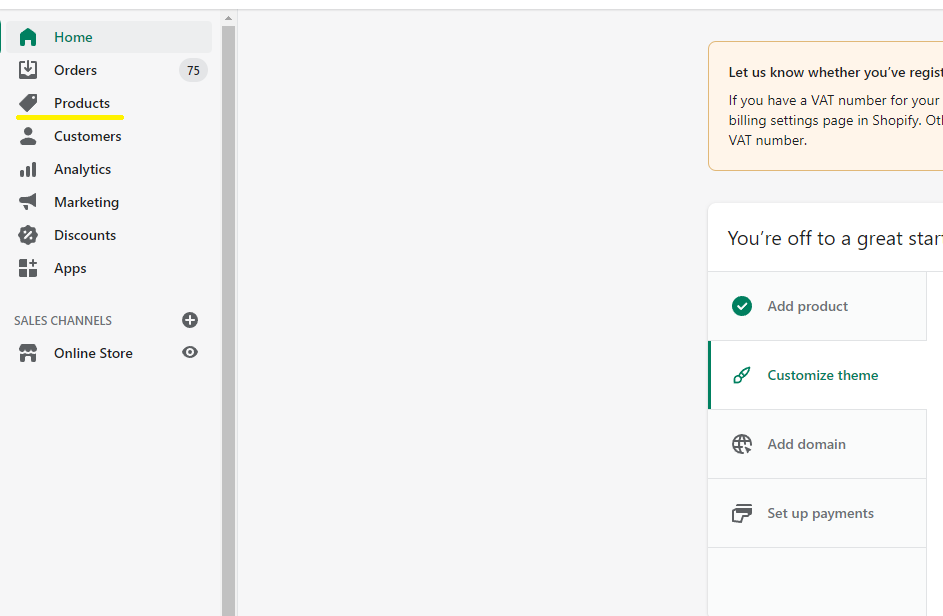
2, Navigation
On the left sidebar click “Products”
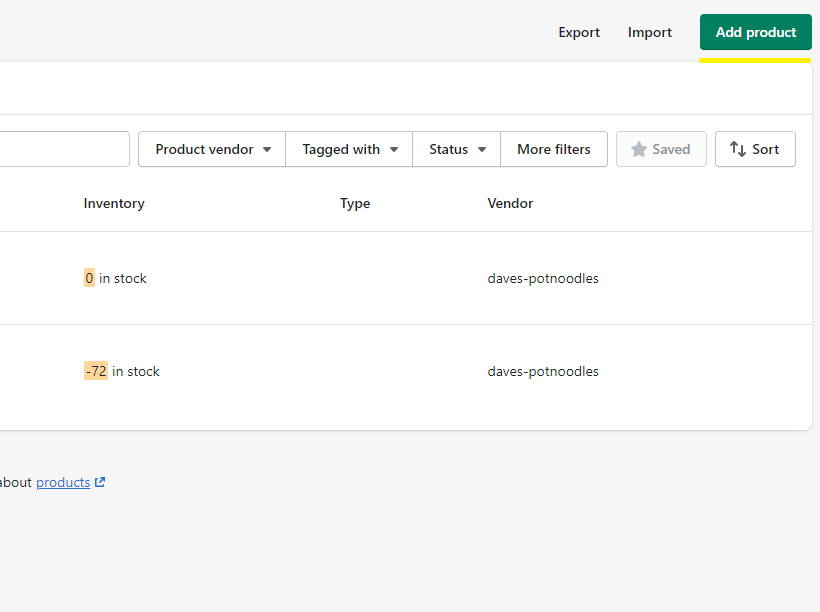
Once on the “Products” page, click “Add Product” - Top Right
3, Complete The Necessary Product Fields
On the “Add Product” Page, you’ll see a large collection of input fields, we’ll discuss each one to understand its purpose, whilst populating the fields:
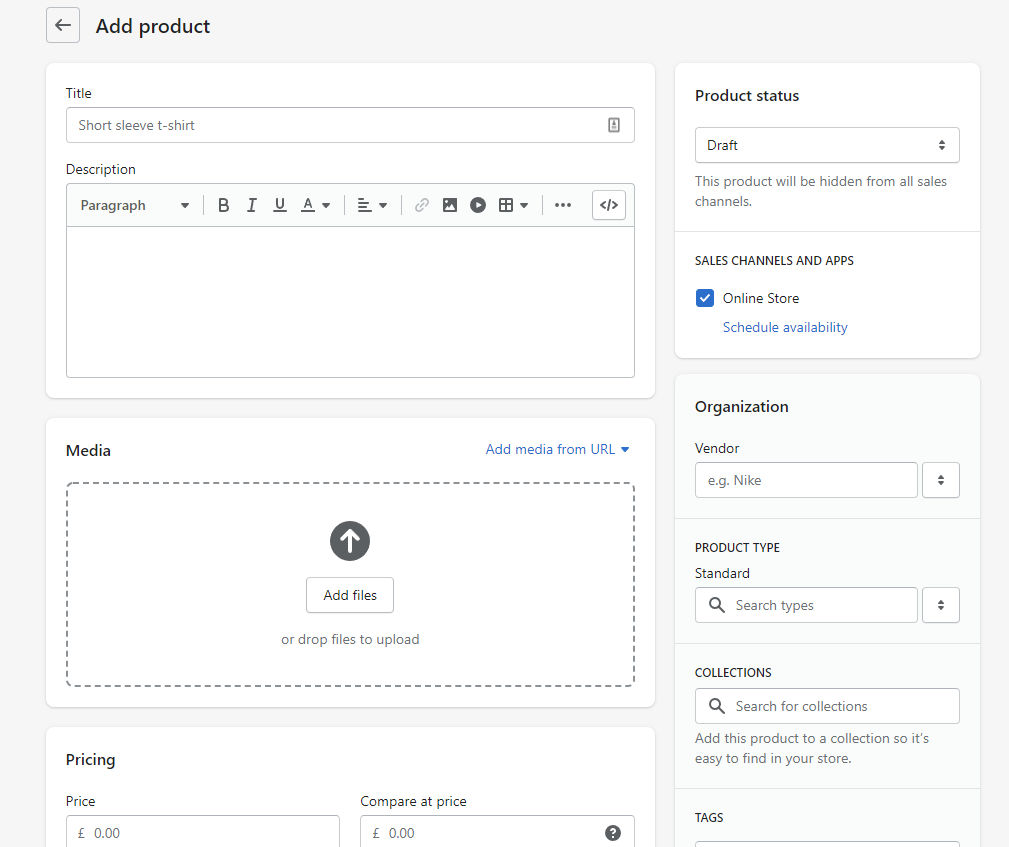
3.1, Title
Not that it needs much explaining, or does it? We seem to find more often than not, especially dropshippers, put little effort into the title. The title, after the image, is what a potential customer is attracted to.
A good descriptive title will encourage the potential customer to read the description.
Bad Examples:
- T-Shirt
- Colorful Trousers
- Long Broomstick
Good Examples:
- Crazy Red Popping Nike T-Shirt
- Hawaiian Pineapple BooHoo Trousers
- Epic Long B&Q Broomstick
Typically speaking, and without editing the SEO input fields, the title would be in the format of: {Secondary Keyword}{Brand}{ProductType}. This is really to truly entice customers to read the description.
Overall the full title name would be the Primary Keyword for which customers will search for.

3.2, Description
Just as important as the title, you really need to create a buzz, but also descriptive. The customer needs to understand what the product is, and does it fit the purpose in which they are looking for.
Be creative, but be descriptive and focus on:
- Benefits of the product
- Details of the product
- Including Keywords
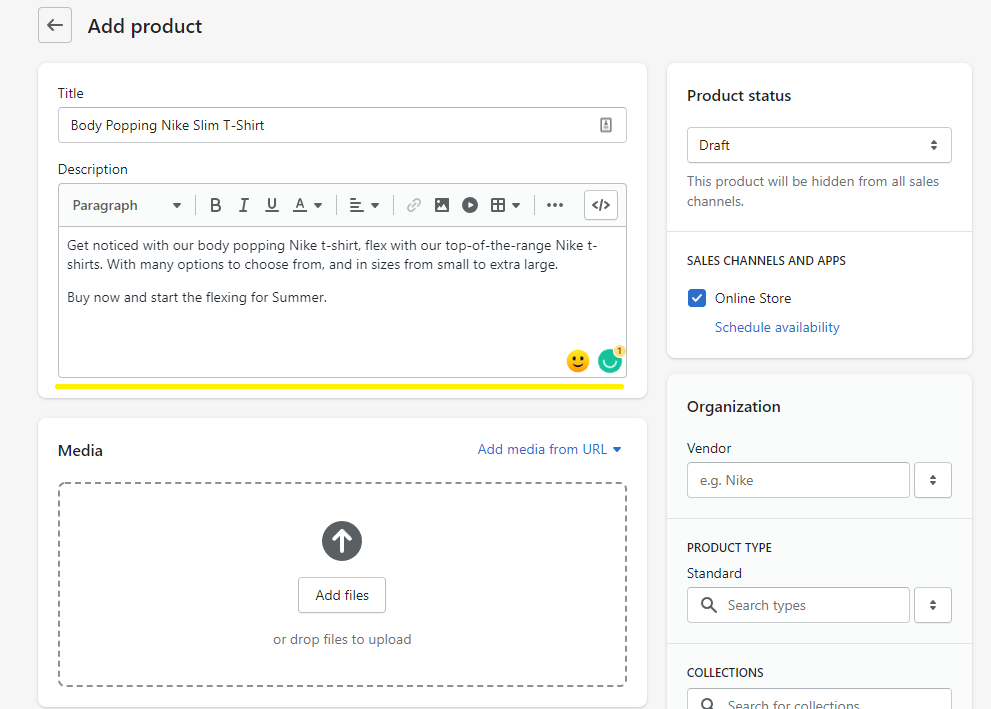
As with the title, if not “editing website SEO” search engines will use this as the default.
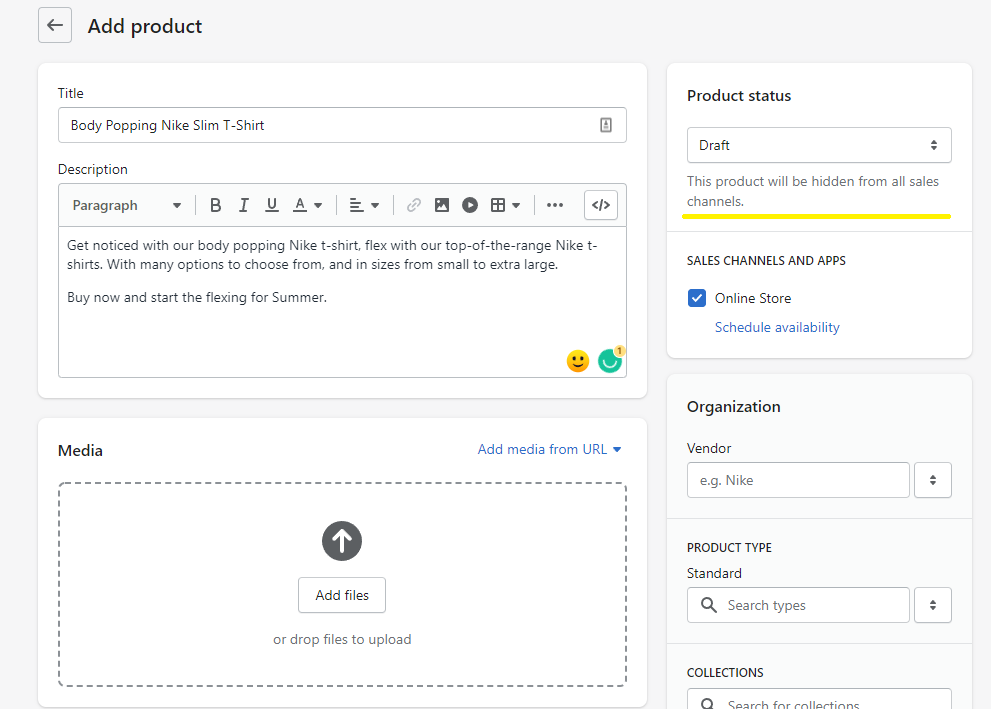
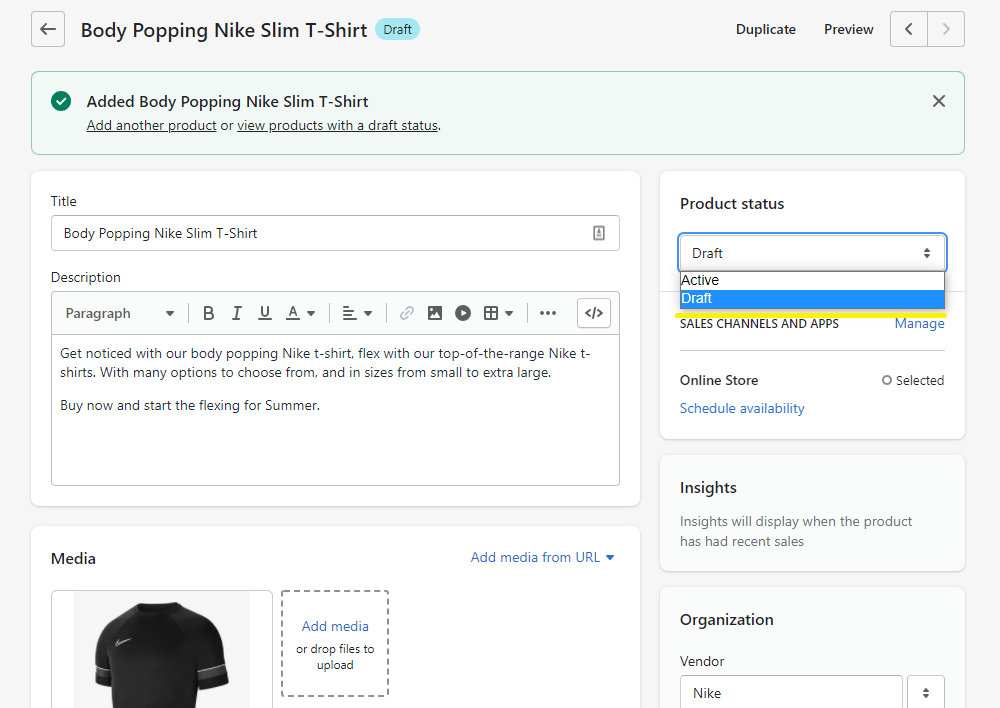
3.3, Product Status
In a professional capacity, it’s never a good idea to quickly fill in the details and activate the product.
Ensure you’ve proofread at least 3 times, to ensure the title, description, SKU, pricing, and general information about the product is correct before activating.
For the purpose of this blog post we'll keep the product status set to - draft.
To note: Always leave the status set to draft. Only set to active when you are 100% happy with the listing.
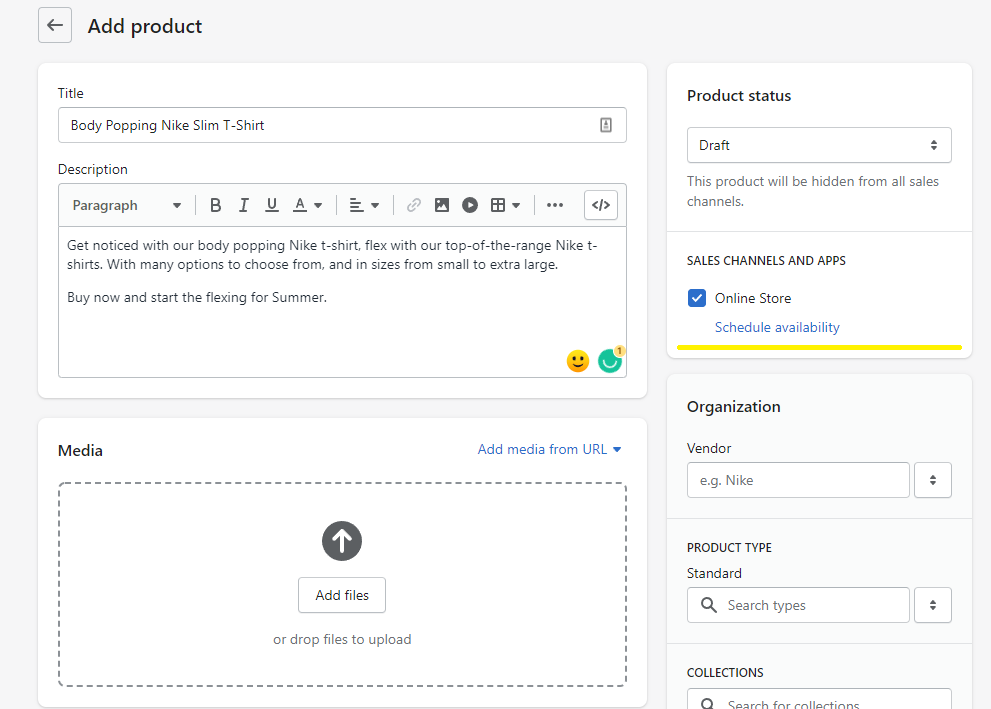
3.4, Sales Channels And Apps
Here is where you manage the newly created product to be listed on multiple sales channels, and apps.
Sales channels currently available:
- Online Store
- Shop App
- Buy Button
- Wholesale channel
- Handshake
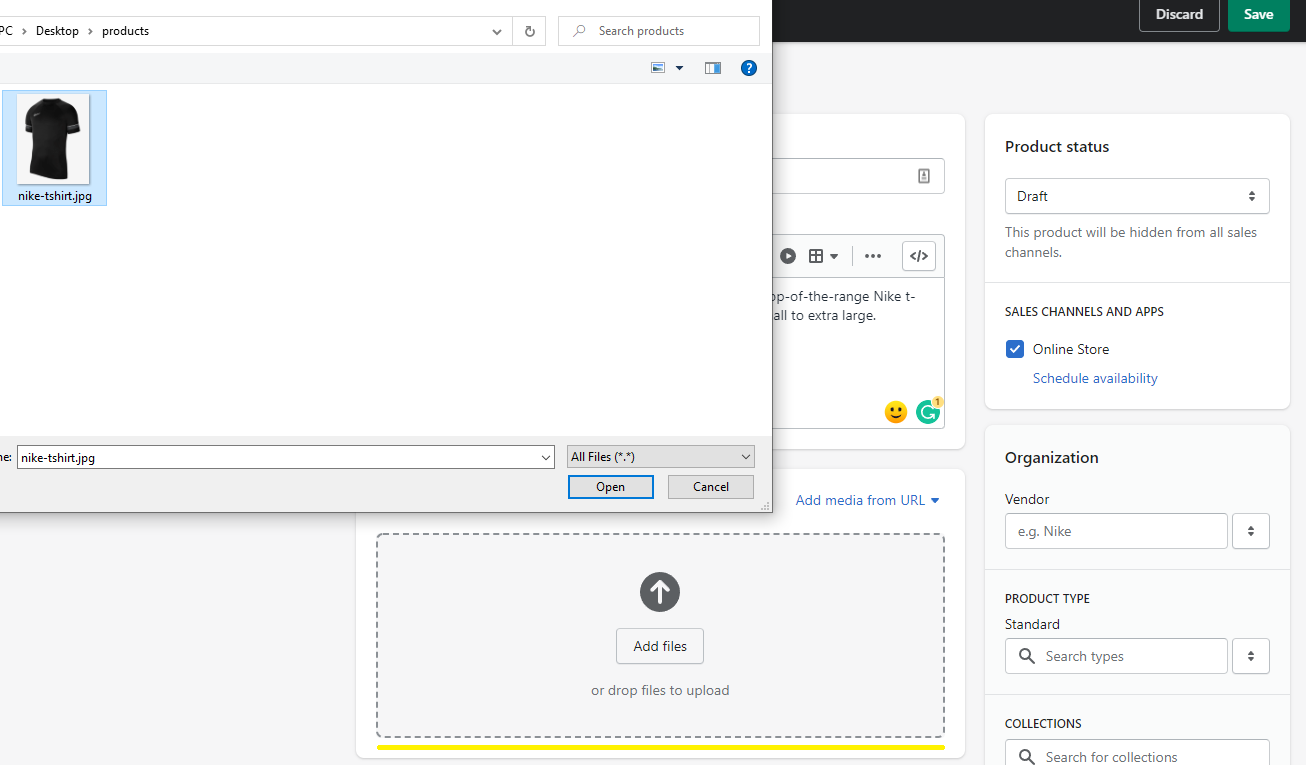
3.5, Media
Media is a photo or video of your product, either drag and drop, or click.
Option 1: Click or Drag Drop the media section.
Option 2: Add media from URL, typically an image or video hosted elsewhere.I.E where the asset does not reside on your device.
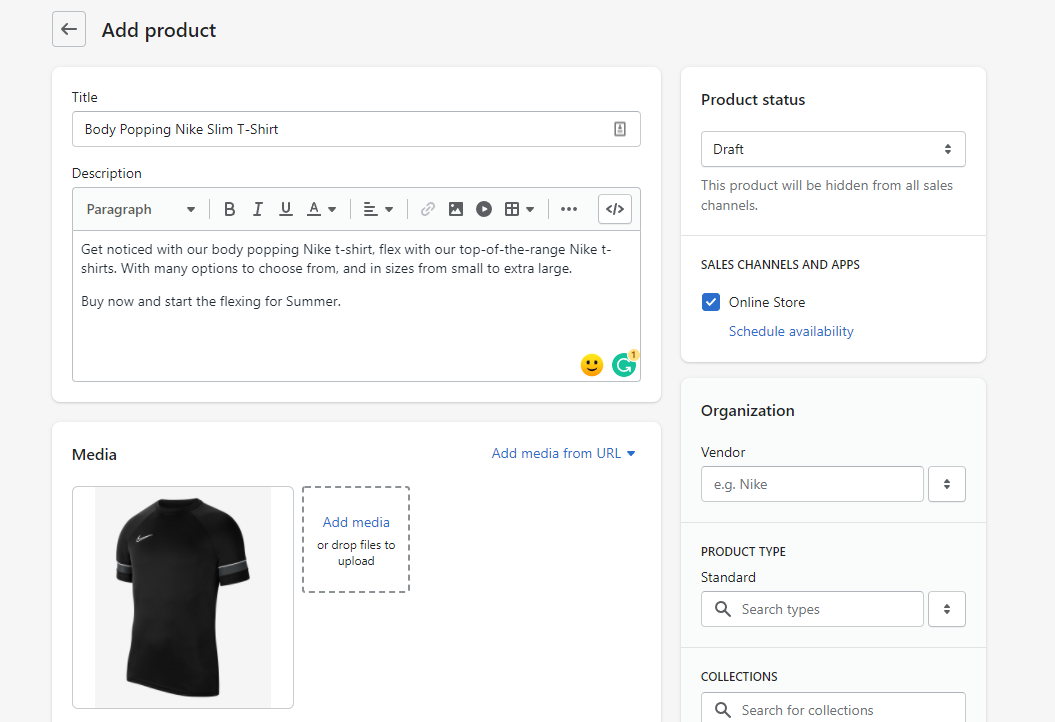
3.6, Organization: Vendor
Organization vendor, similar to a brand. This can be displayed to the end-user for further details about the product.
It’s always a good idea to provide as much information as possible.
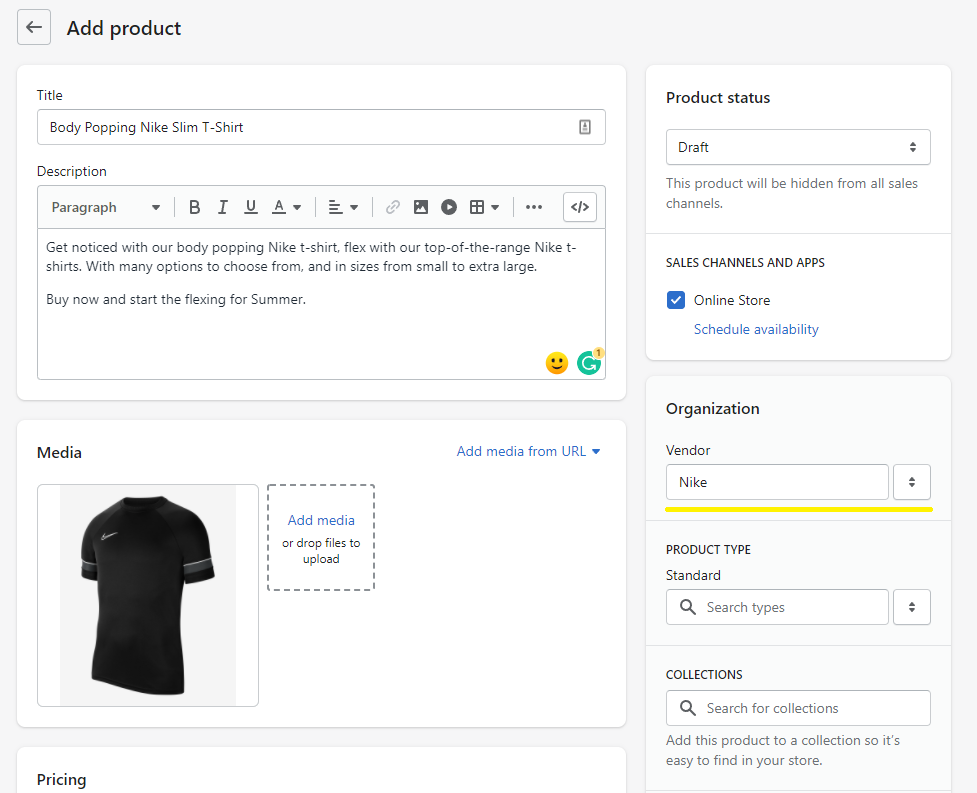
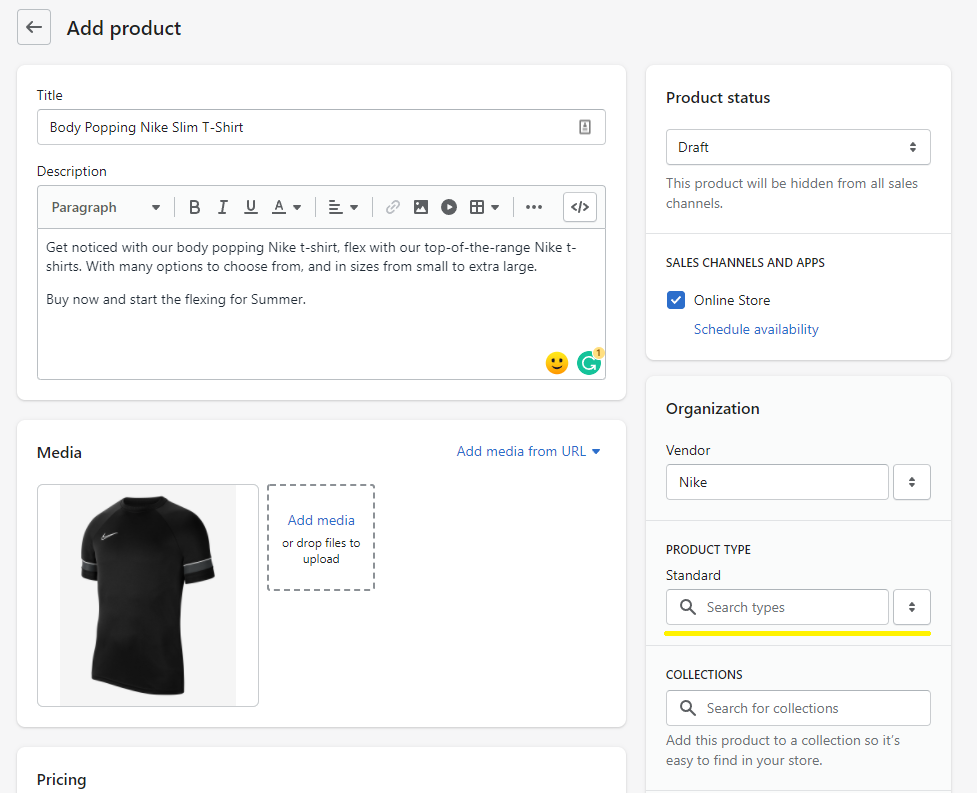
3.7, Product Type: Standard
Product type is essentially nested categories and provides additional information about the product and helps keep products organized.
With the above in mind, most Shopify store owners leave this blank, or rather as Standard.
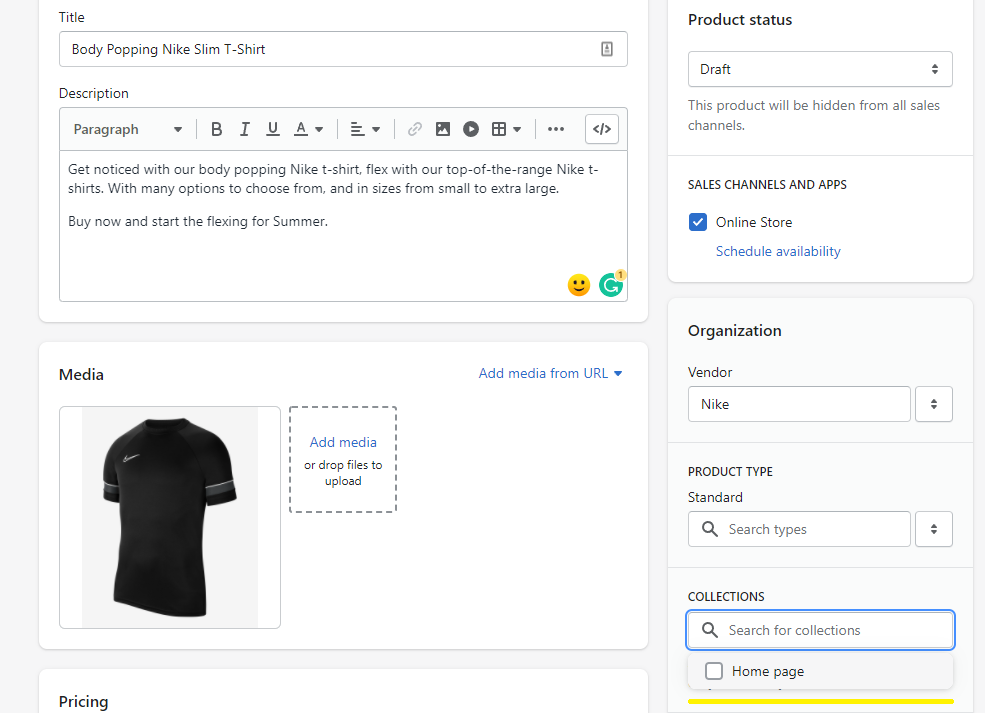
3.8, Collections Search
Shopify primarily works with collections. A collection is a group of products to which the potential customer can navigate.
For example, Creating a collection of “Bra’s” - will help in directing the customer to a collection page where all bras will be listed.
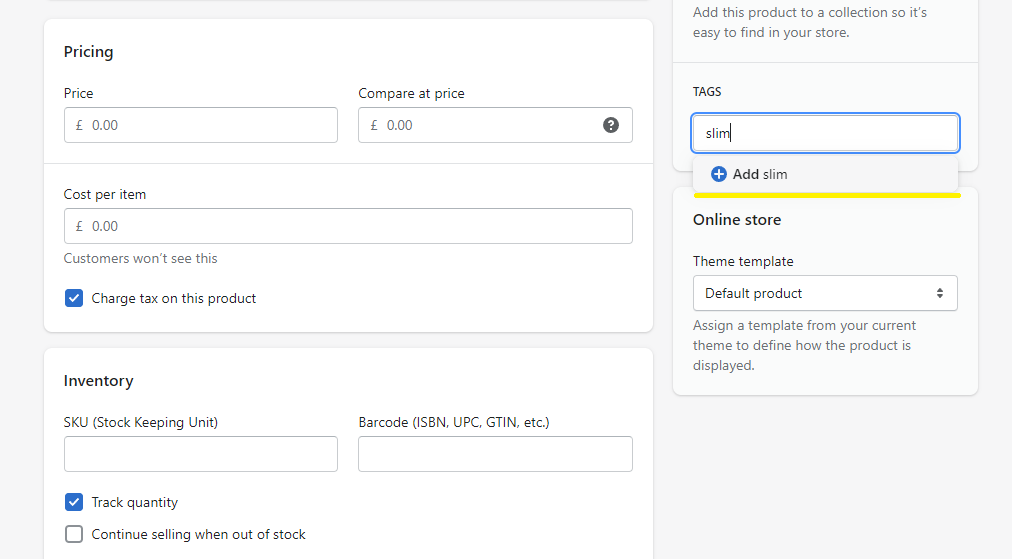
3.9, Tags
Tags, similar to most product aggregators, but are best used when thinking about commonalities between products.
You could tag each product with “red”, and when clicking the “red” tag on the storefront, all products with a tag of “red” will become viewable/accessible.
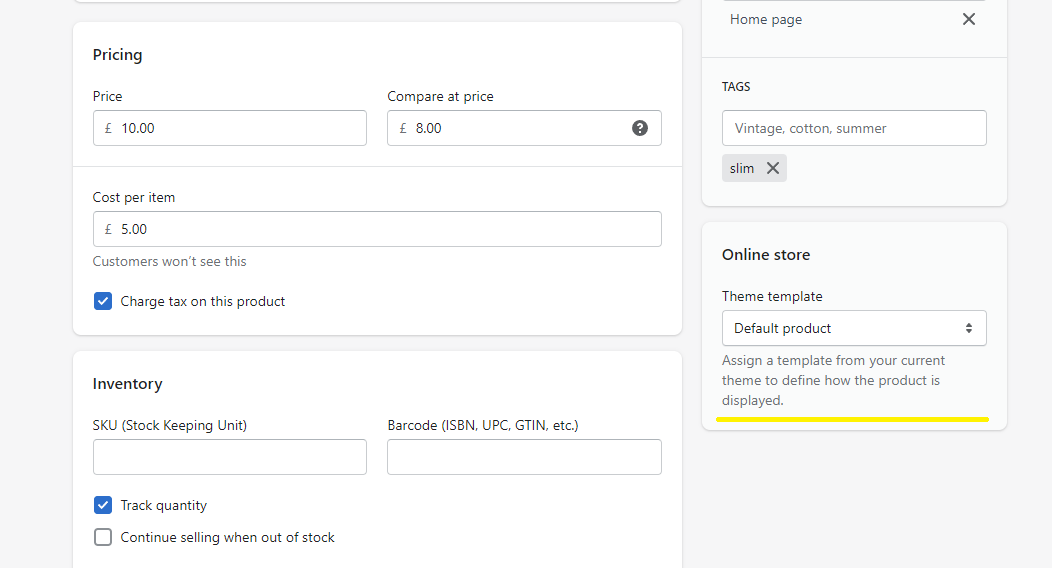
3.10, Online Store: Theme Template
Shopify is a template-driven platform, meaning each page is a series of templates and accessible components.
Most store owners leave the template as default, but in some scenarios you may have a custom-created a template to display a unique layout for a particular product type.
This is the option to select to display the newly created product template.
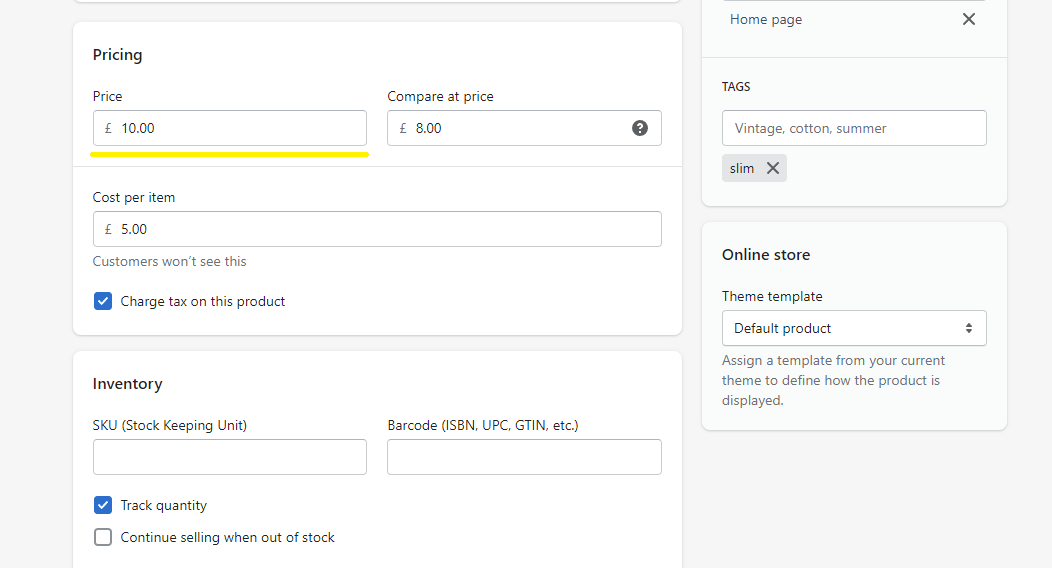
3.11, Pricing: Price
The retail price is the price that is displayed on the storefront and is not to be confused with “cost per item”
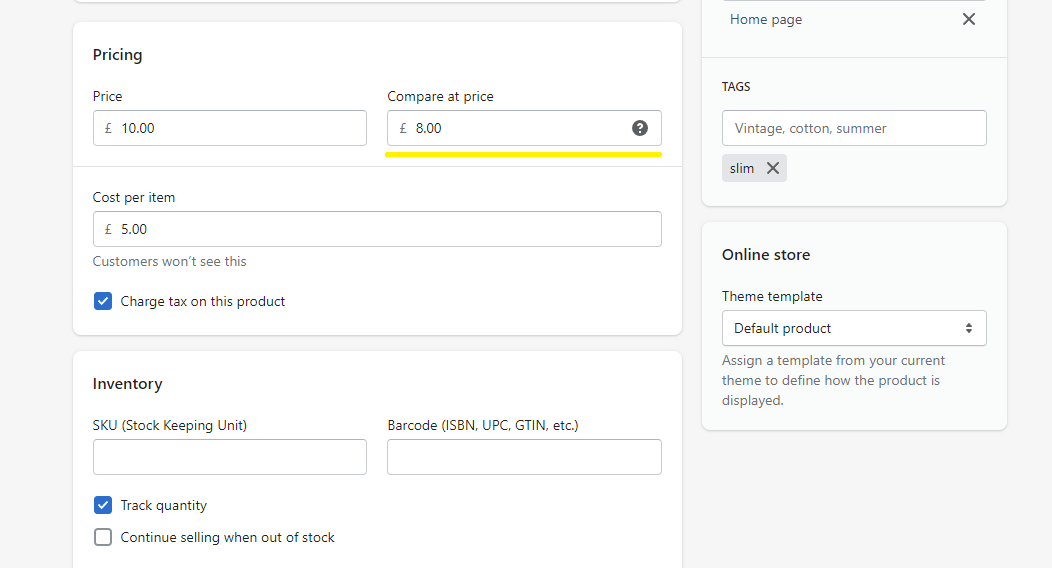
3.12, Pricing: Compare At Price
Compare at price, you could argue is like a discount, whilst not directly a promotion, but rather an option to “strike” out the retail price and display the compare at price, giving the customer a visual indicator of the retail prices and compare at price.
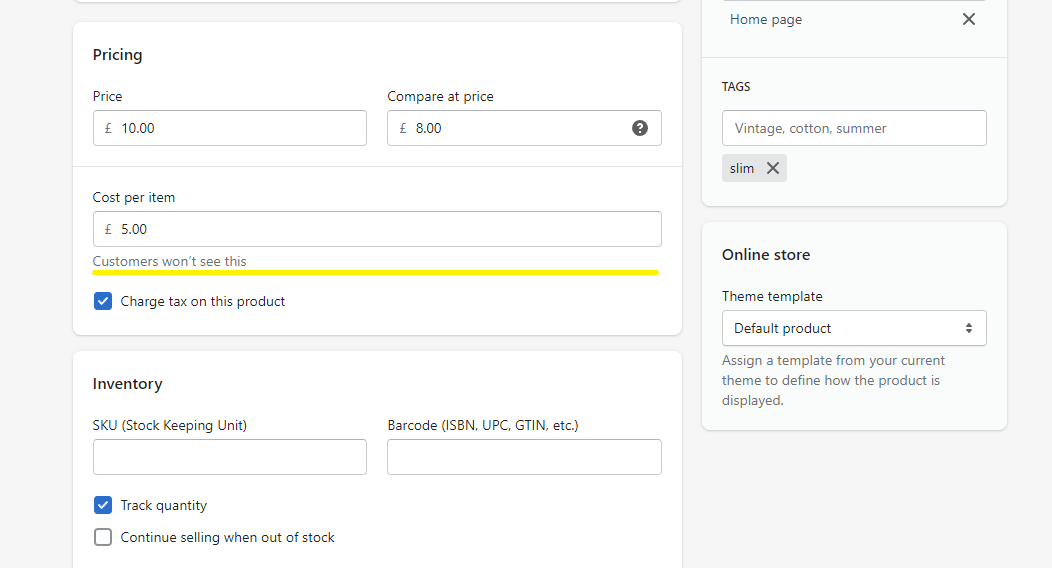
3.13, Pricing: Cost Per Item
Excluding all taxes, shipping, and any other cost, it’s essentially the price you paid before reselling.
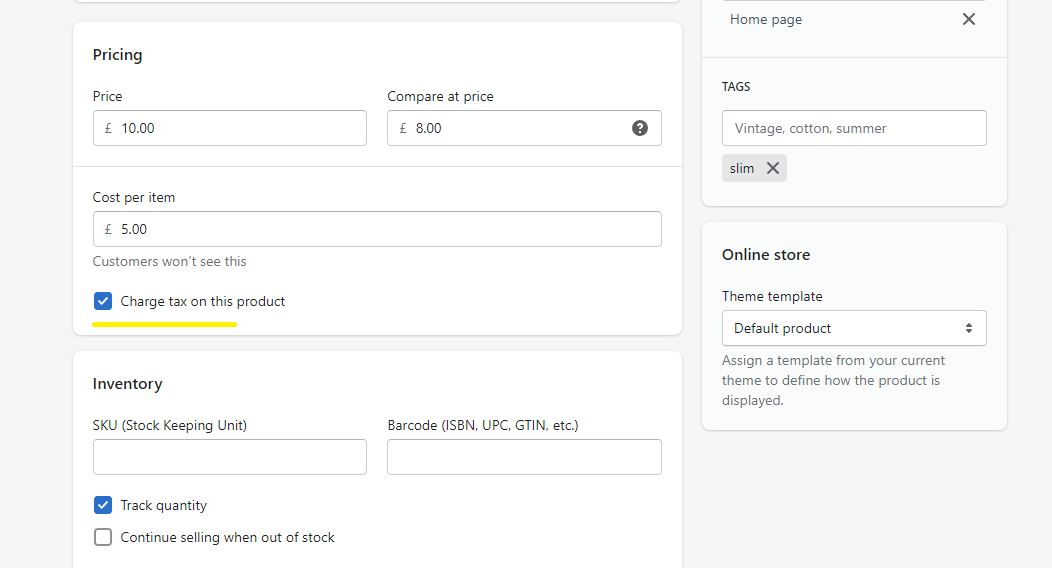
3.14, Pricing: Charge Tax On This Product
An option to apply tax to the overall sale. Taxes and overrides can be applied, and are primarily dictated by the country of origin tax laws.
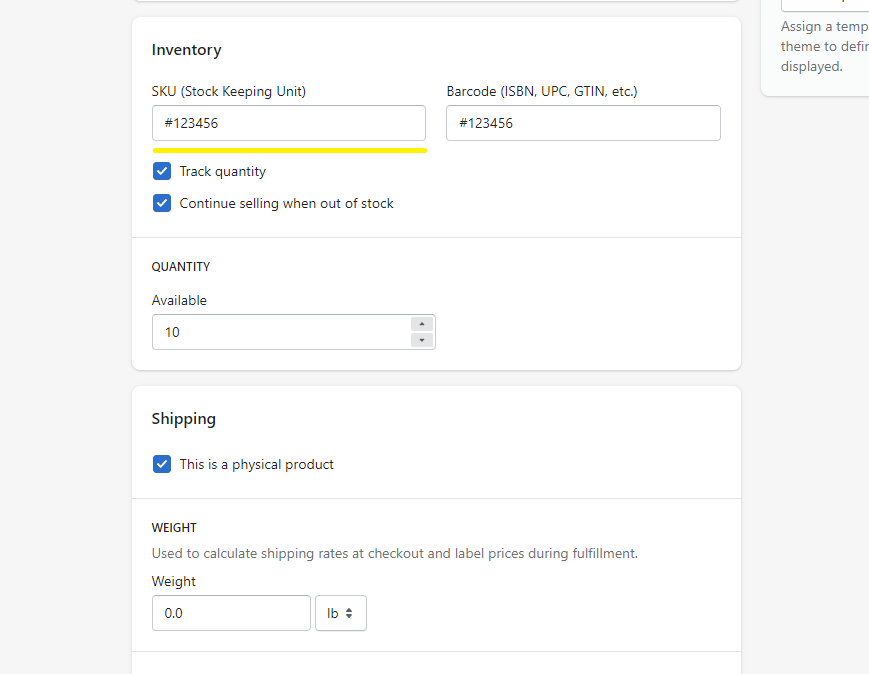
3.15, Inventory: SKU
A Stock Keeping Unit (SKU) is a unique number in which allows you to track the product, including variants. Typically each variant of a product will have its own SKU.
The SKU is widely understood and should be used whenever possible.
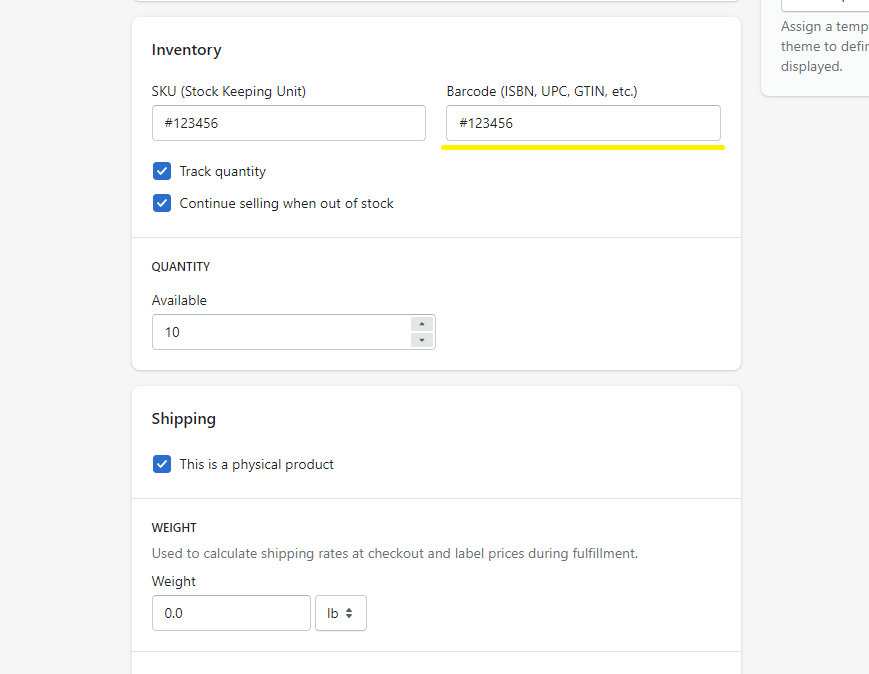
3.16, Inventory: Barcode
An image with a series of lines that provides information about the product. In most cases, simply adding the SKU will be enough to identify the full product.
More information on Barcodes can be found at: Lab916
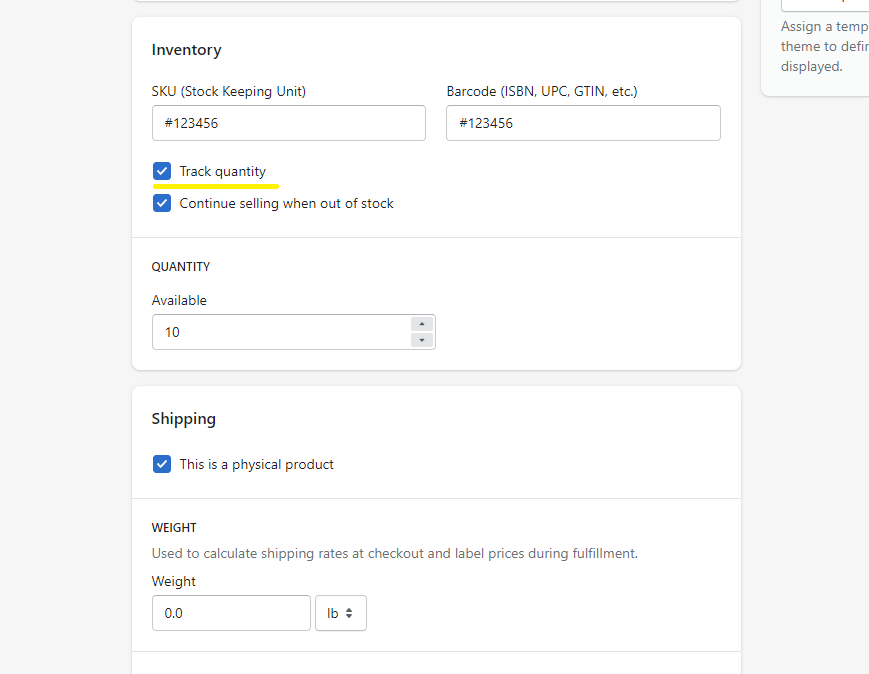
3.17, Inventory: Track Quantity
As the title indicates, an option to track the quantity. I.E when a sale is made, the sold item(s) will be deducted from what’s currently in stock.
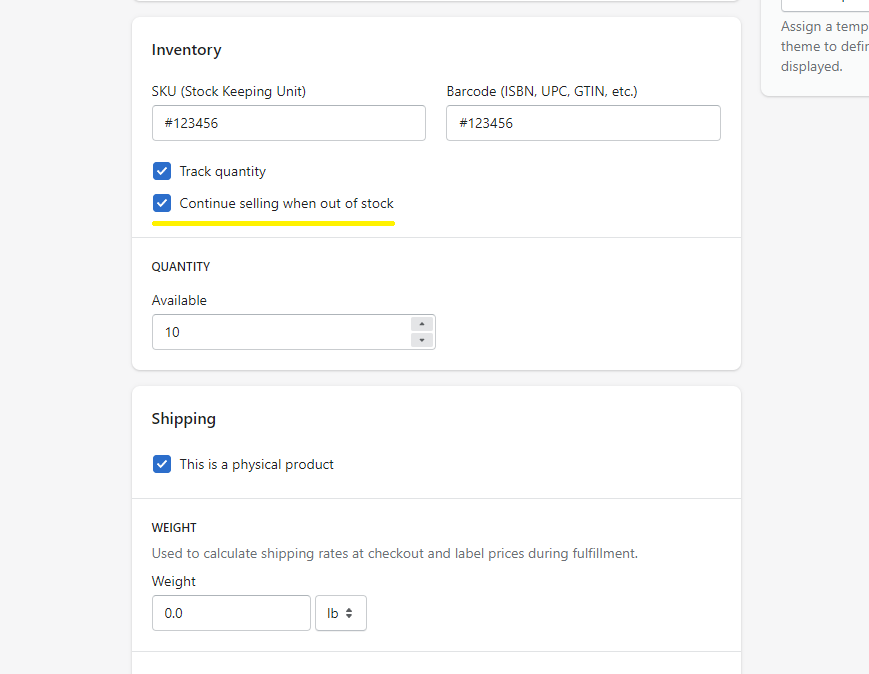
3.18, Inventory: Continue Selling When Out Of Stock
Very few stores require the need to allow pre-orders or partially ship. However, continue without selling allows you to ignore whether the product is in stock, or not.
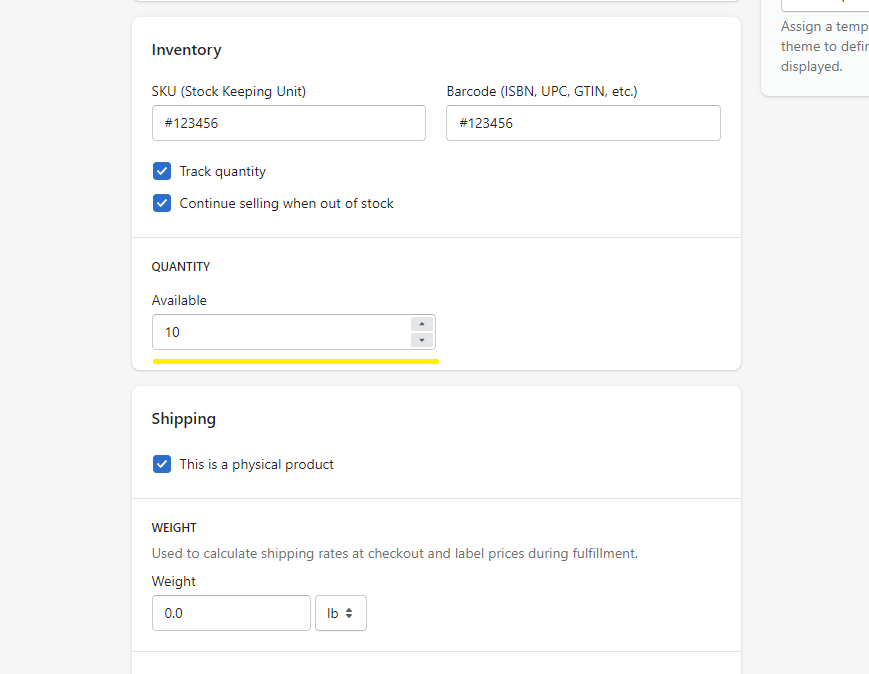
3.19, Inventory: Quantity
The actual quantity that’s currently in stock. This will fluctuate depending on sold items, and what’s being replenished.
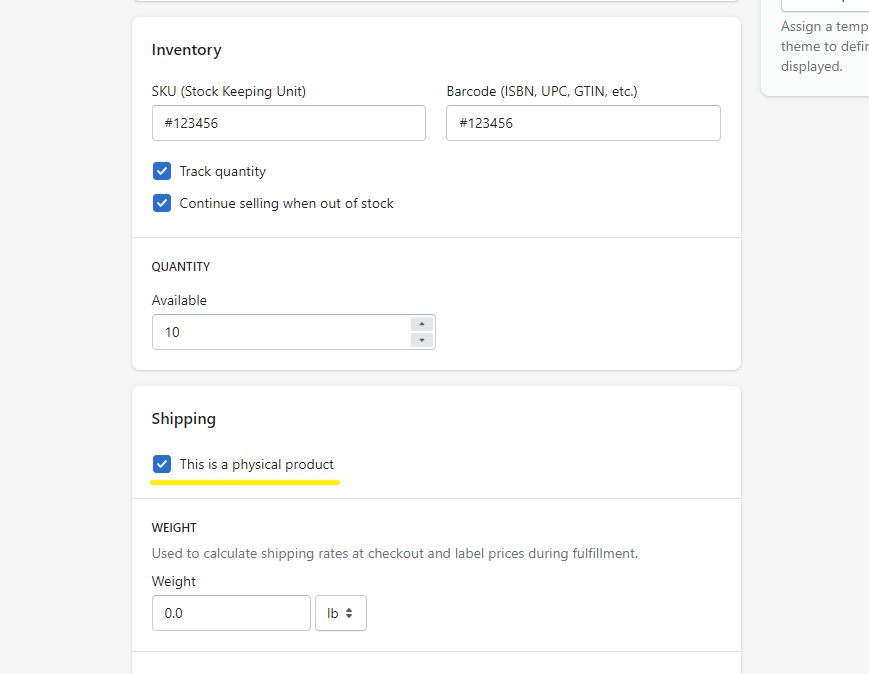
3.20, Shipping: This Is A Physical Product
Simply put, an option to determine whether the product is digital or not.
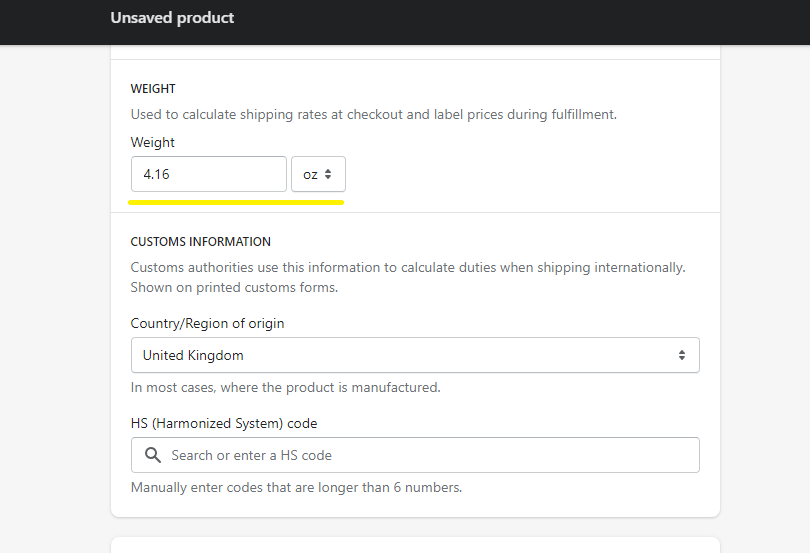
3.21, Shipping: Weight
A large percentage of stores require the need to understand the weight of each product to calculate shipping costs.
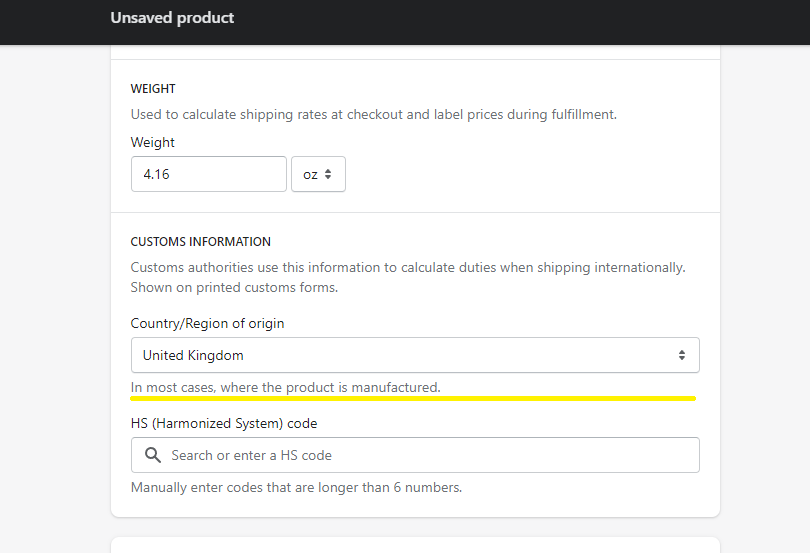
3.22, Customs Information: Country/Region Of Origin
Customs authorities use this information to calculate duties when shipping internationally. This is typically where the product was manufactured.
Most store owners select the country from where the product is being shipped from.
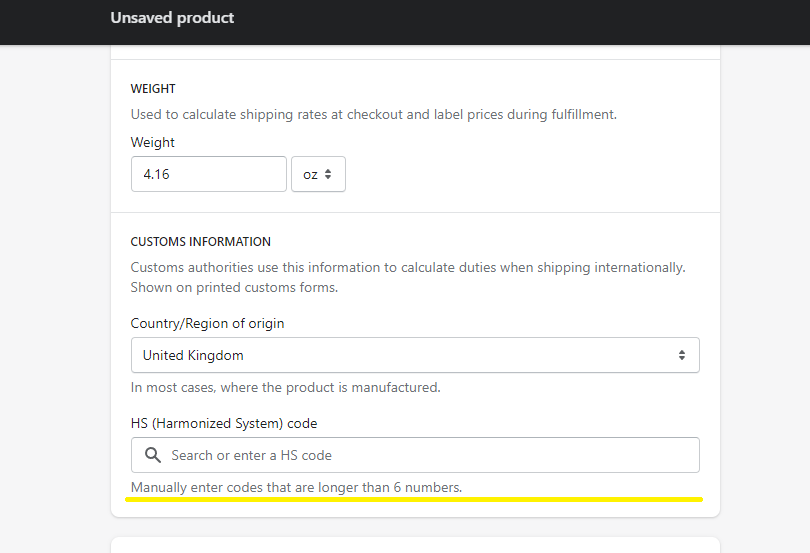
3.23, Customs Information: HS Code
When shipping products internationally, you’ll may want to use HS codes. The HS codes provide customs with more information to apply the correct tariffs.
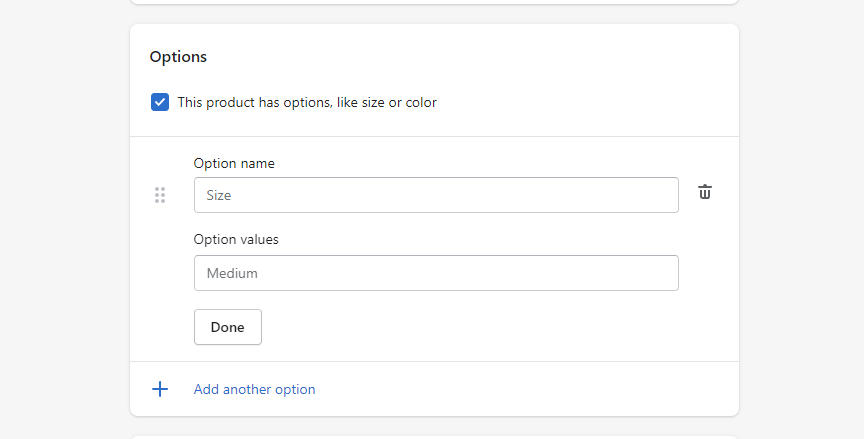
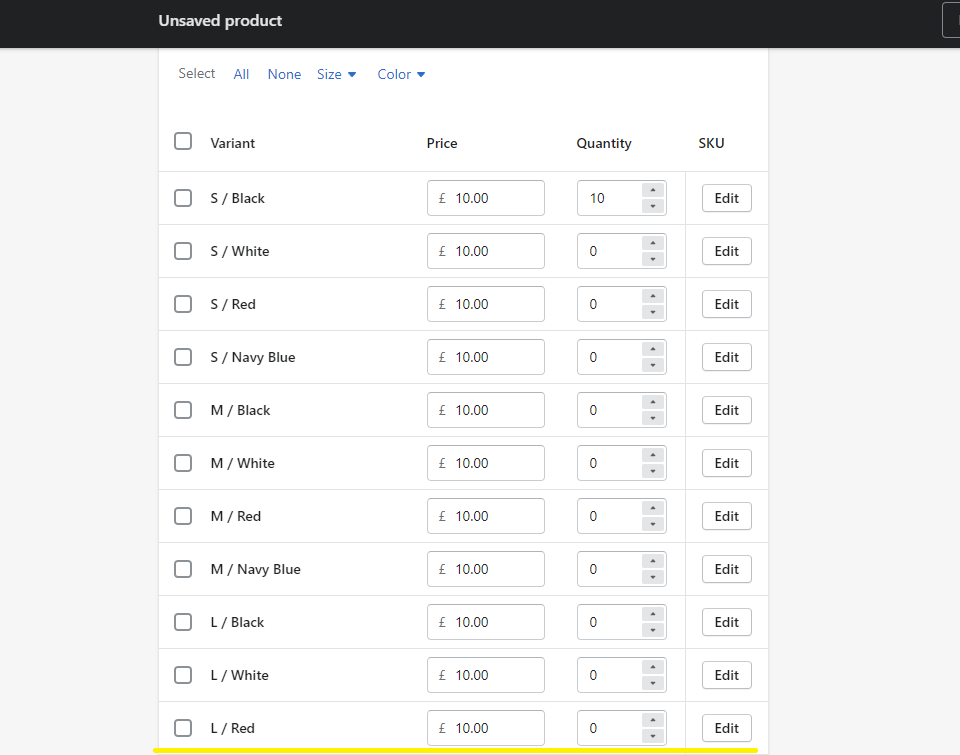
3.24, Options: This Product Has Options, Like Size Or Color
In a large percentage of online stores, variants are used heavily - typically in the clothing industry.
A variant is a variant of a master product - meaning, you create a product and each product has a different size, color, and possibly price.
The master product, or rather the initial product may be “Red, XL, and 29.99” but a variant could be “Yellow, L, and 24.99”
3.25, Edit Website SEO: Page Title

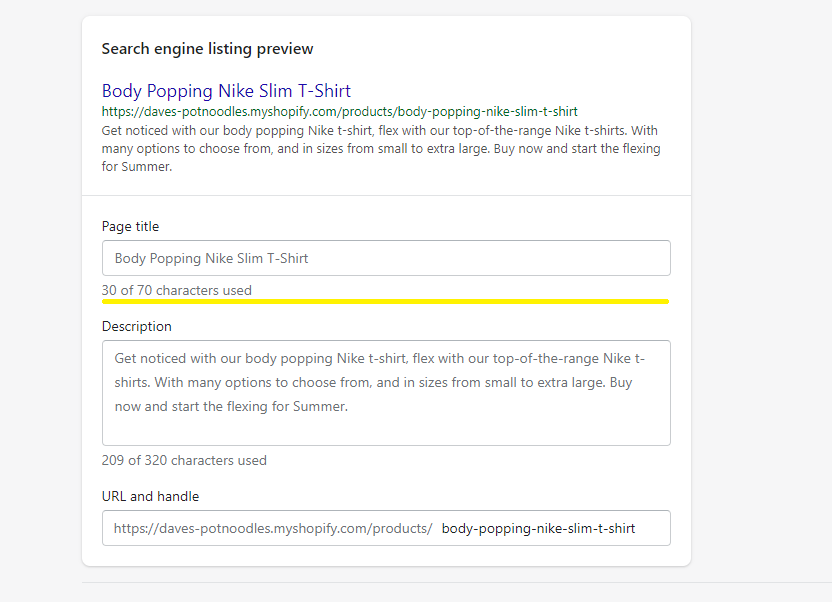
Much like the storefront title but this time, a title for search engines to read and understand. In most cases, if the storefront title includes necessary keywords and is well-formatted for crawlers then editing the SEO title can be ignored.
However, this should be tweaked if the storefront title exceeds the recommended character count for SEO - which is around 60 to 70 characters.
More details on SEO Title max length can be found at: Moz Title Max Length
3.26, Edit Website SEO: Description
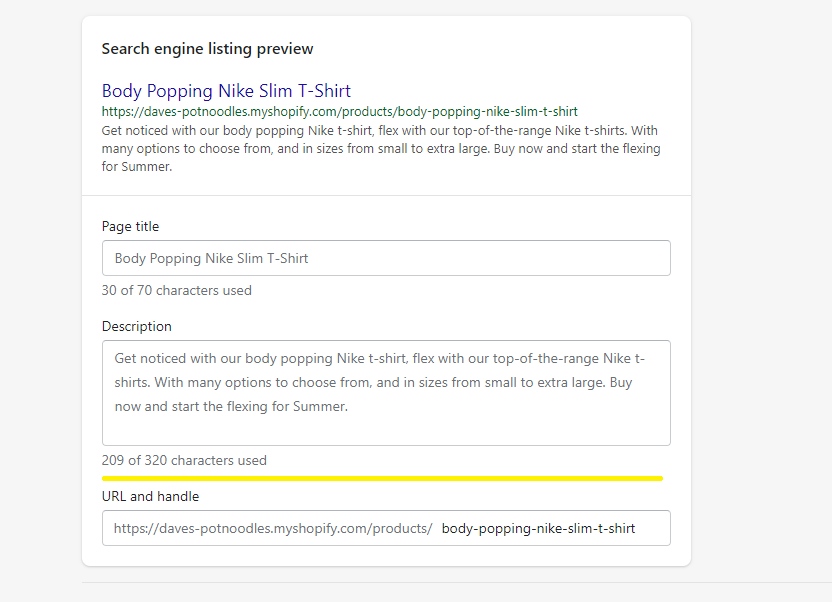
The same concept as the title, but for the description of the product. If the storefront description is detailed enough, this should not need to be changed, unless the description exceeds 155 characters.
More details on SEO Description max length can be found at: Moz Description Max Length
3.27, Edit Website SEO: Url And Handle
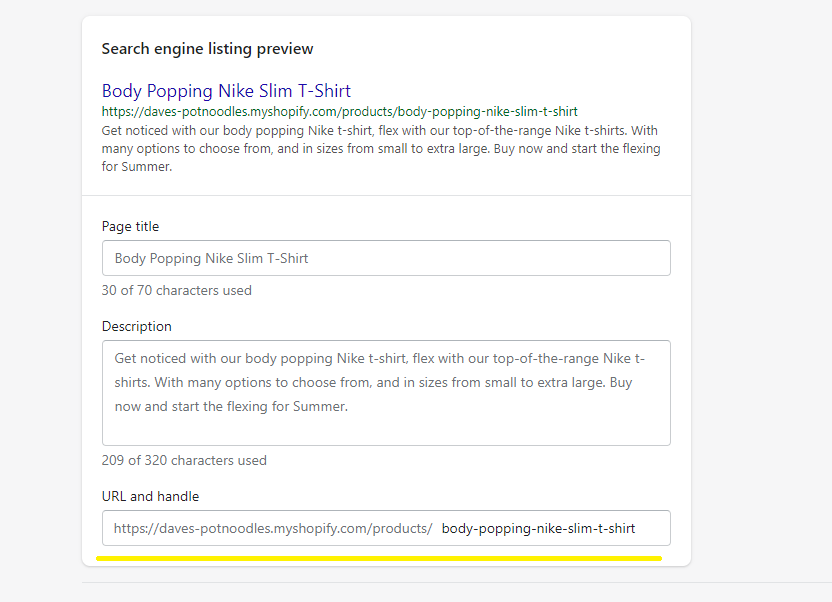
The URL and handle are best used for creating an SEO-friendly URL.
To note: this is the latter part of the URL. “Pages”, “Products”, and “Collections” can not be overwritten.
In a use-case scenario, you’ve added a product with a name off “rambunctious-37-trousers”, but the idea of “37” in the URL may not align with your current SEO strategy, or does not fall under a particular keyword - in that scenario, you would simply change the URL to: “rambunctious-trousers”
4, Going Live
At this point, you’ve measured demand, you’ve got a pretty good reception to the product - now it’s time to go live! Activate the product!
Once live, virtually zero people know about it! Start creating social media content, schedule the content to publish between 19:00 and 20:00.
Do the same for your email list - schedule.
You’ll want to capture interest at the right time.
For increased exposure, recreate some of the designs/posts and reschedule for 2 days in the future.
5, Create A Blog Post
Regardless of what the product may be, it’s time to create authoritative content - this will be your feeder content. I.E If you’ve added a new bra, now create a post on “how to measure cup size”. Also, include the newly launched product, and top sellers to maximize exposure.
Send an email to your subscribers with a link to the blog post.
Blogging for business is hugely popular, and drives incredible results - check out our blog post on: "how to blog for business to get more sales"
6, Build Backlinks
Great news, new product, and, new blog post, but ideally you’ll need to start ranking the new blog post.
start connecting, get out there and start engaging with other bloggers, start promoting your new blog post, ask for backlinks, or start guest posting to increase authority.
Or alternatively use a guest posting out-reach link-building service to get some initial link juice. Use the Hoth, it’s extremely affordable and you only need to do this once, or twice for the initial.
 The Hoth
The Takeaway
Adding a product to Shopify takes a few steps, but what is challenging, is actually getting a sale.
Always focus on how you plan to drive traffic to your product page, and more importantly, is it a good product, and will it sell.
To summarize, we've briefly covered:
- Testing demand
- Taking multiple product shots
- Photo consistency
- Taking the perfect product shot
- Creating pre-launch interest
- Adding a product, with details on each input field
What next:
- Always aim to provide value: - Learn How to blog for business to increase sales
- Creating a product is half the battle, learn How To Increase Traffic To Your Shopify Store
- Can customers customize products on Shopify?
- Where can I get products to sell on Shopify?
- Can I add my own products to Shopify?
- Do I have to pay for inventory?
- Are products on Shopify legit?
- Can I add products from Amazon to Shopify?
- Can I archive products in Shopify?
- Can I bulk upload products to Shopify?
- Share this post, every little helps.
- Subscribe to our newsletter below for tips and tricks to help boost sales.
Additional Shopify Resources
With Shopify being one of the largest eCommerce platforms on the market means you’ll never be short of resources to learn how to build a profitable eCommerce business.
Kanteneo aims to be the best Shopify blog on the market, but you may require additional resources to help you on that journey. Below we’ve listed a top-selling Shopify book by Veronica Jeans to help you learn how to launch a profitable business.
