How to Change Your Domain Name on Shopify
Changing your default Shopify url to a custom domain represents a huge milestone. You’ve created an awesome Shopify store, spent countless hours in the Shopify backend, and perfected product images, descriptions, and the customer journey.
However, all of the above will go to waste if you do not change your Shopify url to a custom domain.
Your certainly in the right place if you need to know how to remove shopify from the url.
Professionalism sells!
Below you’ll find steps on how to change the Shopify domain name, but before moving on, let’s understand why it’s important.
1, Why Change Your Shopify Domain Name
Ever received a cold email with an “@gmail.com” extension, and instantly deleted it? We have!
A domain name is typically your brand and Shopify store name, with a bit of due diligence you can really outperform your competitors that disregard the importance of branding.
It’s very important to understand that a brand name/domain name gives you a greater chance of succeeding.
Let’s face it, would you really purchase from a store with a domain name similar to: https://cheapshoes.myshopify.com/ ?
It’s very unlikely! Most stores that simply ignore creating a brand, fail early on.
"Only 5% of shops launched on Shopify reach success and make a large number of sales online. The main reasons 95% of stores fail are the tough competition, lack of budget, and poor online business management knowledge of entrepreneurs. Also, experts say that an unwisely chosen dropshipping niche also leads to failure."
- Source: ThriveMyWay
The benefits of a custom domain:
- Enforces professionalism
- Allows better branding
- Helps with marketing
The below steps will help if you’ve already purchased a domain, but if you haven't, check out namecheap. Namecheap is one of the cheapest domain registrars on the market!
 Namecheap
2, How to Change the Shopify Domain Name
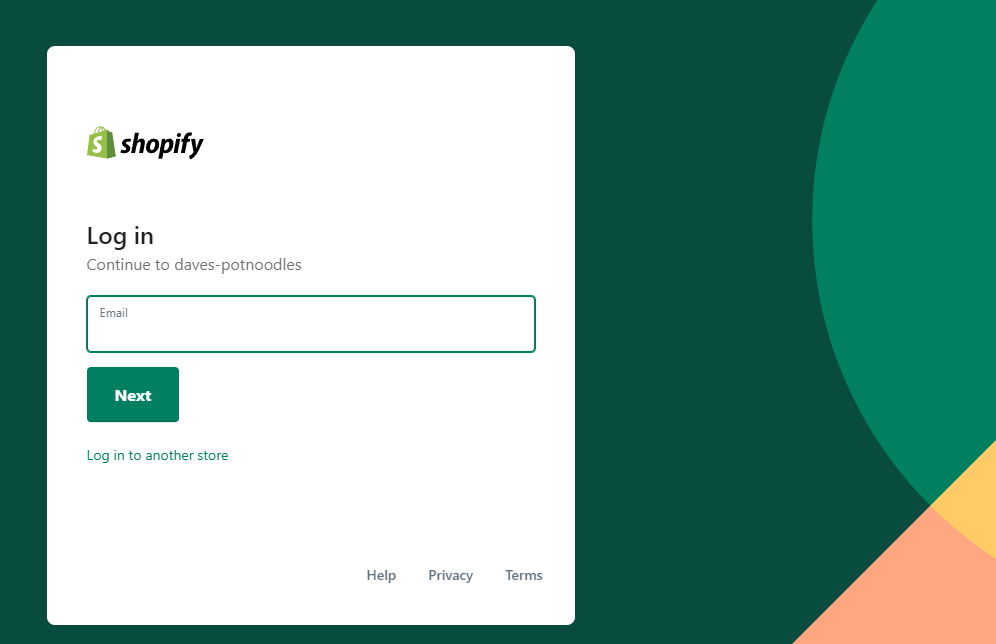
Step 1: Login
Navigate to your admin login page and log in.
Step 2: Settings
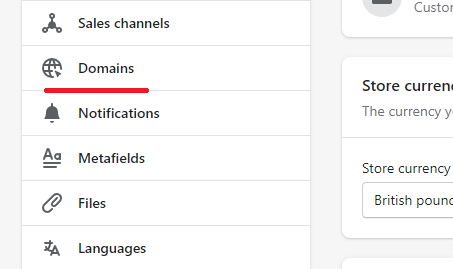
Navigate to the left side panel, scroll to the settings button and click

Step 3: Domains
After clicking settings navigate to the domains button.
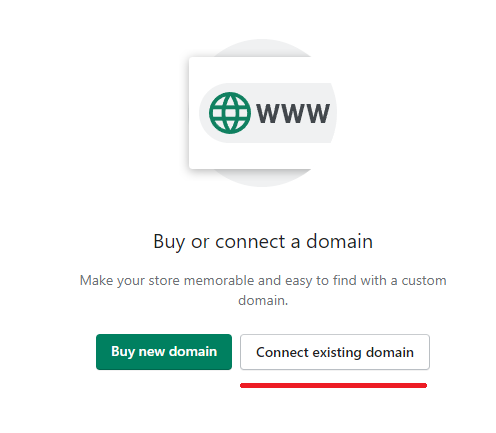
Step 4: Connect Existing Domain
After clicking domains, you'll be prompted with a page that has two options "buy new domain", and "connect existing domain". Connecting to an existing domain typically refers to a prior domain name purchase outside of Shopify.
Most retailers already have, or plan to purchase a domain name outside of Shopify. In this example click "connect existing domain."
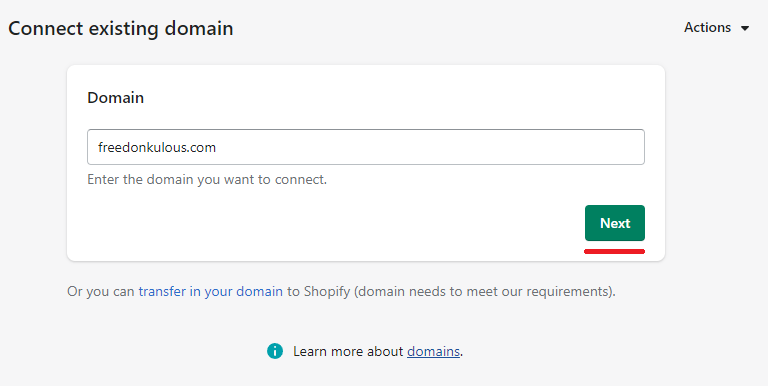
Step 5: Add Domain
Write your domain name in the textbox and click next.
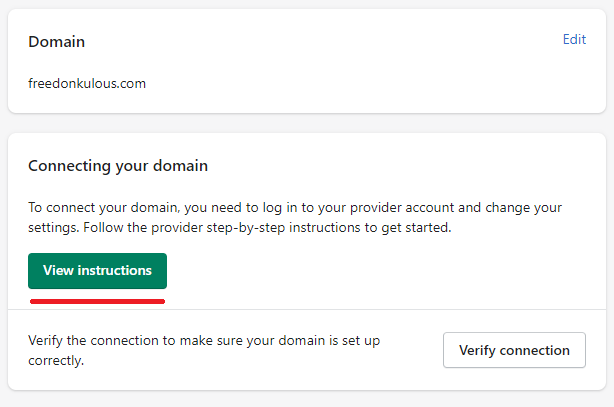
Step 6: View Instructions or Integrate
It's important to note that Shopify will display either "show instructions" or "integrate" - this is designed to cater for two scenerios, registrars with integrations, and the manual process.
Integrations that streamlines the process with a few clicks of a button.
- GoDaddy
- IONOS
- Google Domains
If you have any of the above as your domain registrar, jump to step 14.
Any domain registrar outside of Shopify's eco-system, will need to complete the manual steps below.
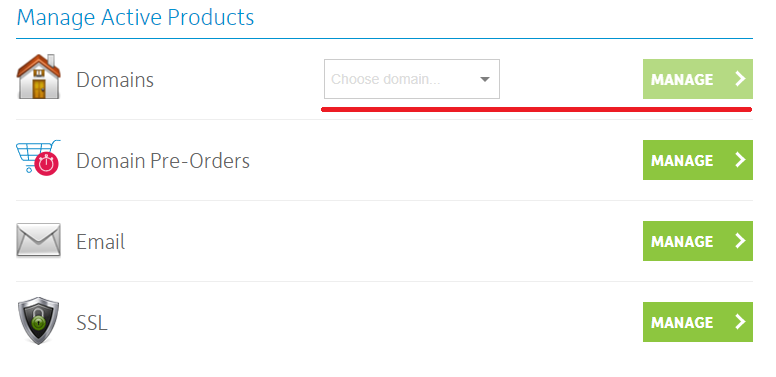
Step 7: Domain Registrar
In this example we're using 123reg, but the steps will be similar to other registrar platforms.
Log into your domain registrar and locate the domain in which you want to add to Shopify.
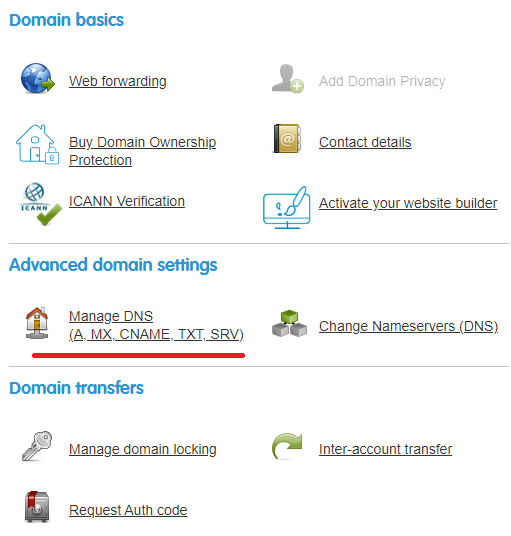
Step 8: Manage DNS Settings
Once you've found the domain to edit, navigate to the DNS settings page.
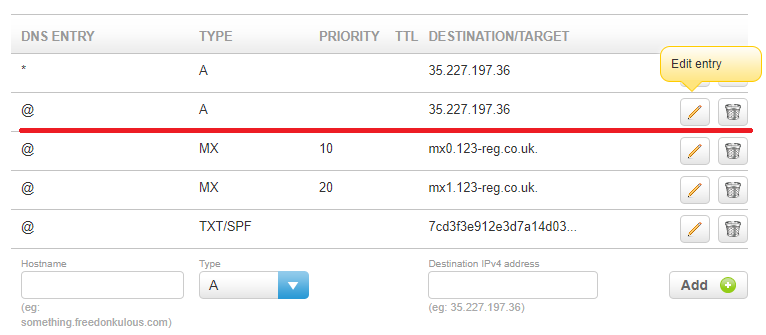
Step 9: Add a "A" Record
Regardless of the registrar most follow the same practise to add DNS records. Once you've found the correct page, you'll want to determine if you have an existing record or not.
In the image below we have an existing record and we're simply going to update it with an IP of: 23.277.38.32
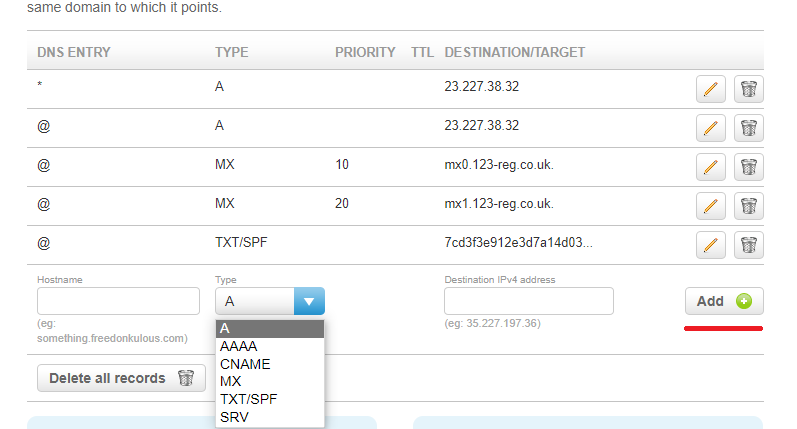
To add a new record:
- Hostname: @
- Type: A
- Destination: 23.277.38.32
- Click "Add"
Step 10: Add a "CNAME" Record
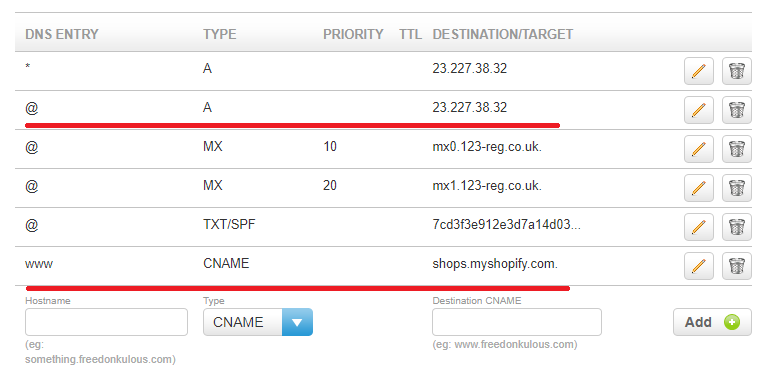
As above, if you have an existing CNAME, simply change the destination to "shops.myshopify.com".
Adding a new CNAME:
- Hostname: WWW
- Type: CNAME
- Destination: shops.myshopify.com
- Click "Add"
Step 11: DNS Success
Success! Confirm the changes by refreshing the page.
Step 12: Verify Connection
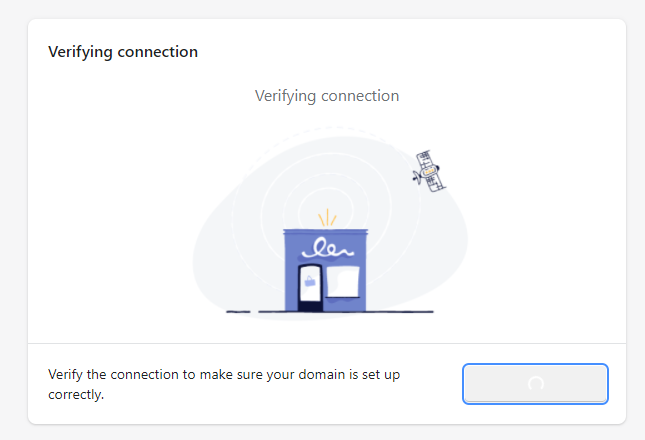
Head back over to Shopify and click verify connection.
Step 13: Verification Success
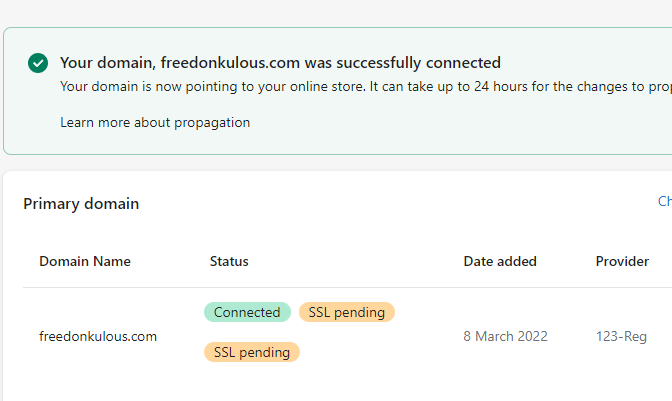
If the verification process was successful, you'll be redirected to the domains page with a success message.
Step 14: A Sanity Check
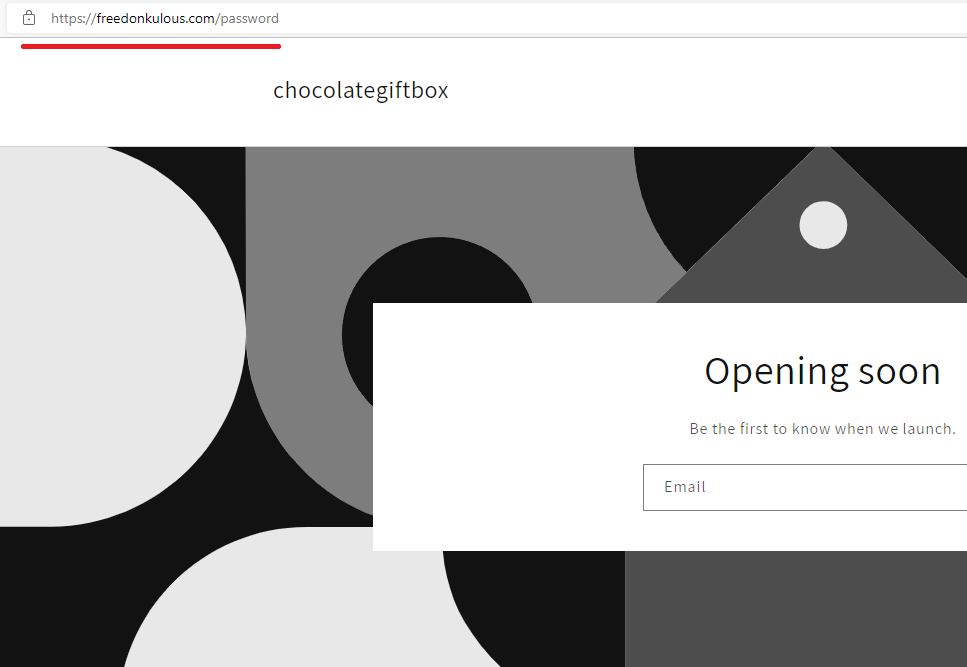
As with any change to your store, you should always perform a sanity check to ensure changes have taken place.
The Takeaway
Taking pride in how visitors see your domain name, brand, and store name is a key element to succeeding.
You must go above and beyond! “Do” what the vast majority of pop-up stores “don’t do”. Aim to be the best, and focus on every element.
To summarize we've briefly covered:
- Why change your Shopify domain name
- How to change the Shopify domain name
What next:
- Learn how to increase Shopify traffic
- Learn how to add a product to shopify that sells
- Learn how to change the collection url
- Learn how to change the store name
- Share this post, every little helps.
- Subscribe to our newsletter below for tips and tricks to help boost sales.
Additional Shopify Resources
With Shopify being one of the largest eCommerce platforms on the market means you’ll never be short of resources to learn how to build a profitable eCommerce business.
Kanteneo aims to be the best Shopify blog on the market, but you may require additional resources to help you on that journey. Below we’ve listed a top-selling Shopify book by Veronica Jeans to help you learn how to launch a profitable business.


