How to Create a Drop Down Menu in Shopify
Creating a drop-down menu in Shopify gives you the ability to structure pages in an organized manner, and is best suited to categories, collections, resource pages, and blogs.
Having a well-structured menu will ensure that your customers navigate to the pages that are most important to you and your business. There is nothing more excruciating than having to filter through a poorly designed site.
"UX is critical to ecommerce because it ensures your customers can easily navigate your website, find what they need, buy it, and move on. And when you make it easy for people to buy from you, they’ll buy more frequently." - Source: WebFX
If you focus on UI/UX from day one, you’ll reap the benefits in the future.
It’s also important to note that no code is required. We’re often asked the question: “can we have the shopify drop-down menu code”, but simply put, there is no code. Shopify has provided all we need in the editor itself.
Whilst the examples below are created using the debut theme, most Shopify themes share the same core structure, so creating and adding a menu will be the same process.
Before we begin, please duplicate your Shopify theme. Whether the changes below will impact your theme or not, it's important to get into the pattern of backing up your theme on every change.
Related blog posts:
We're covering the process of adding a new main menu, that includes creating a drop-down menu item. This will ultimately replace the current main menu on the store front, this giving you the ability to see an end-to-end solution.
Steps to Create a Drop-Down Menu in Shopify
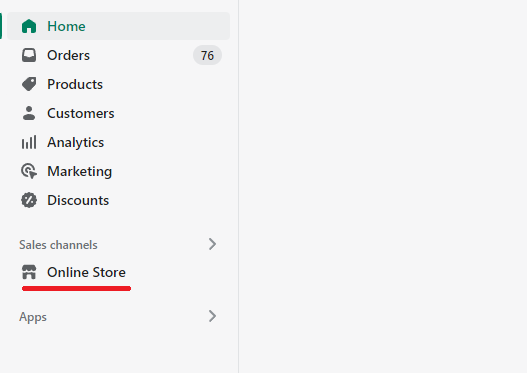
Online Store
Locate and and click "Online Store"
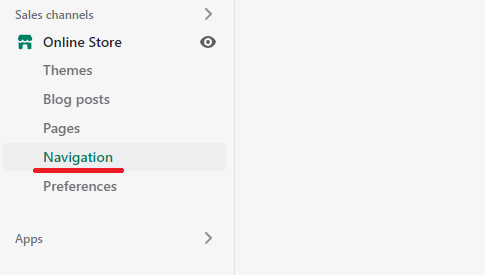
Navigation
After clicking online store, locate and click "navigation".
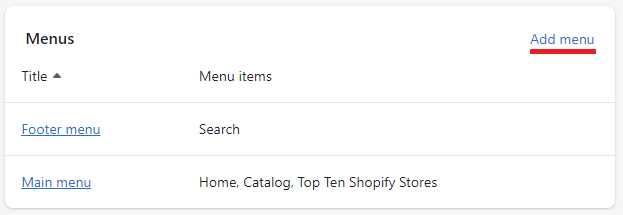
Add Menu
On the navigation page, you'll see existing menu's, and an option to a add menu. Click "Add Menu"
Add Menu Item
Here you'll want to name your new menu. In this example we're eventually going to replace the main menu on the UI with a new menu that includes a drop-down. Once you've named your menu, click "Add menu item"
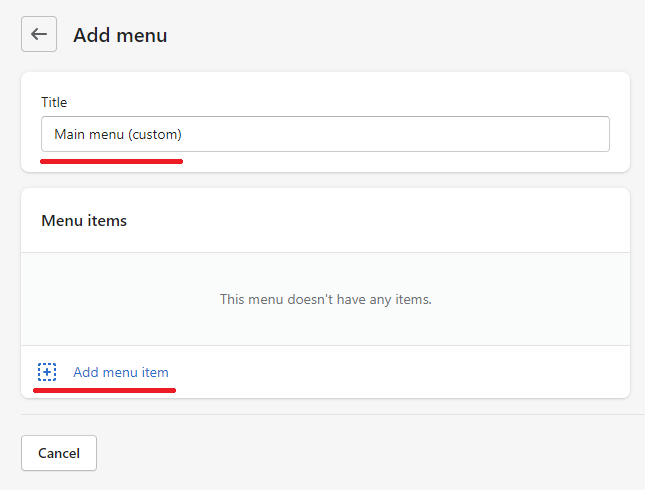
Name Your Menu Item
After clicking add menu item, you'll see an option to name the menu item, and where the menu item points to. I.E a link to the page. For the benefit of this example, name it "Home" and it point it to the home page.
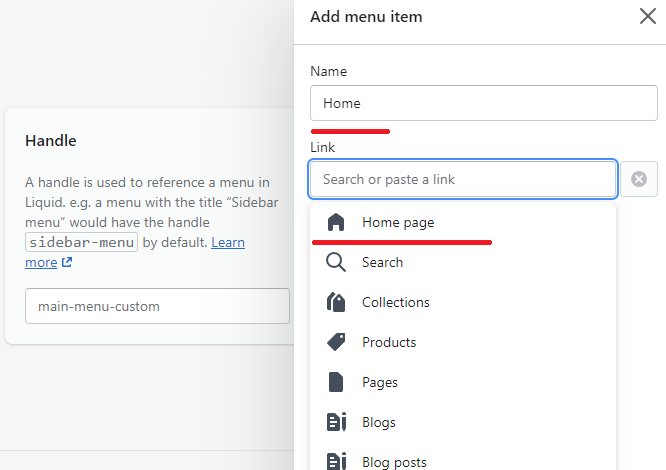
Drop-down Base Menu Item
Now that you've added the first menu item, we'll begin the process of adding a drop-down menu item.
It's important to note that in this example we'll be adding products to a drop-down menu, but this can be blog posts, collections, and custom pages. Essentially anything that is deemed as a viewable resource can be added as a menu item.
In the image below, we're naming the menu item as "Popular Products", and it's going to point to "All collections", but this can be any collection, potentially a custom collection that contains popular products, the choice is yours.
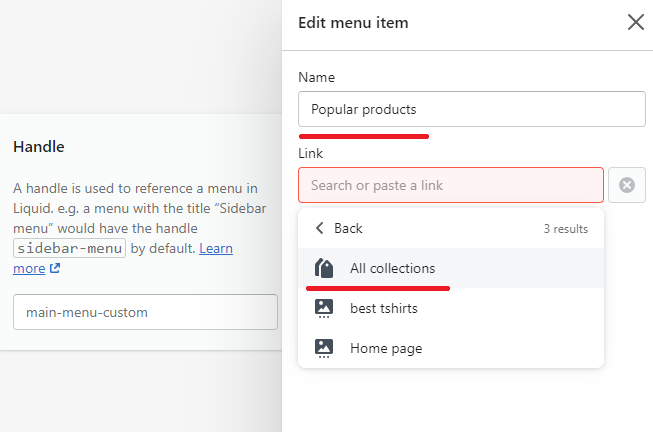
Product Menu Item
Now add a new menu item, but this time choose a product.
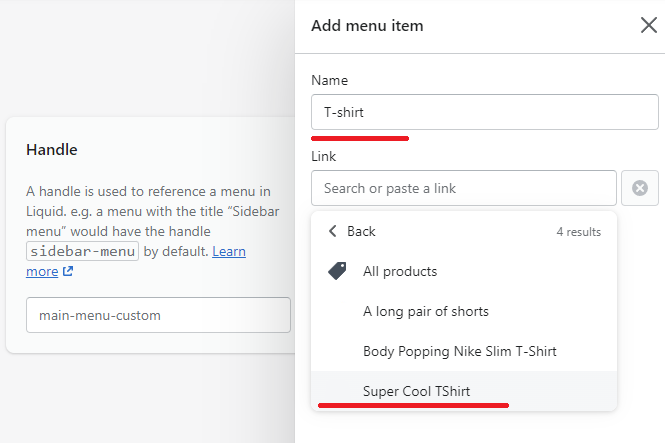
Creating the drop-down
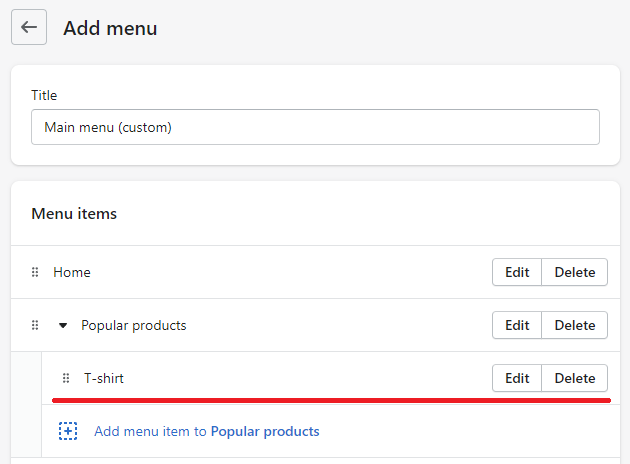
So, at this point you've added a base menu item "Popular Products" and a "product" menu item. Drag your new product menu item just below the popular product menu item.
You should have similar results to the image below.
Add More
Repeat the process until you are happy with the results and click save!
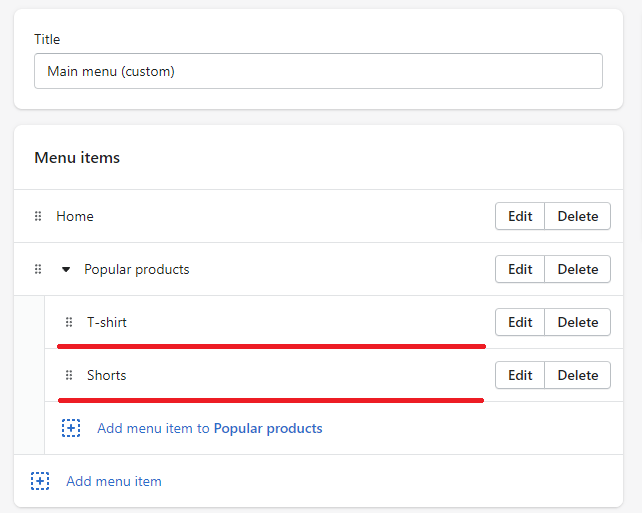
That's it! you've created a menu with a drop-down, but wait! you’ll obviously need to add it to the UI.
It’s important to note that the main menu component in a theme can be replaced with the new drop-down menu just created, but ideally, we want to add the new drop-down to the existing main menu, or completely replace it.
In the following section, we'll cover how to replace the main menu with the new drop-down menu.
Steps to Change the Shopify Main Menu
Online Store > Themes
Click online store and then themes.

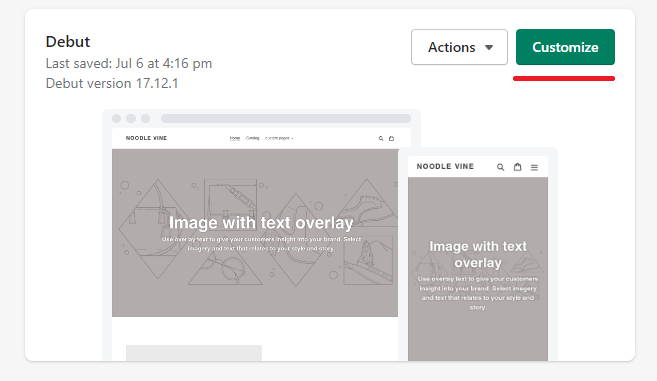
Customize
Locate and click customize.
Header
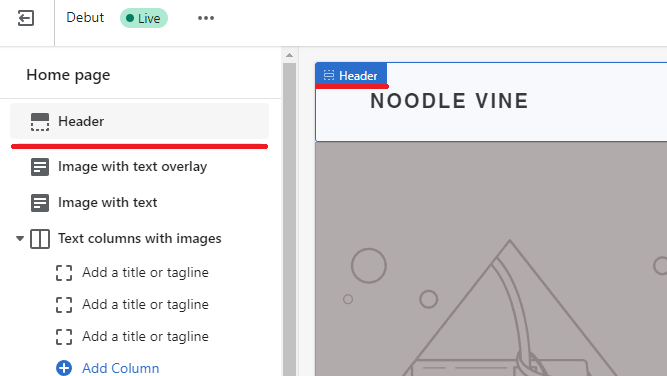
Click the header button, and ensure the header element is highlighted.
Main Menu Section
With the header element selected, you should now see an option to change the main menu - click it.
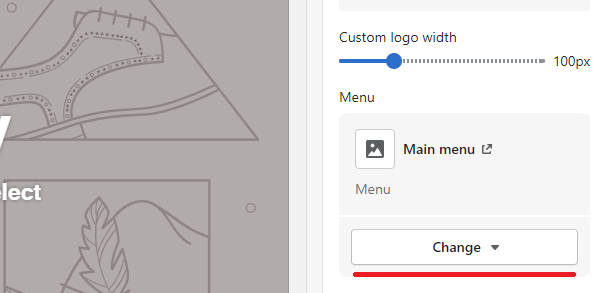
Main Menu Options
You'll now see two options, Change menu, and Remove menu. Click change menu.
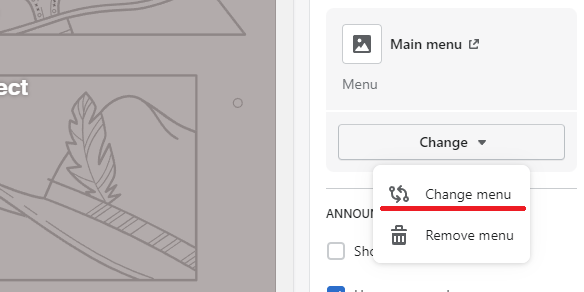
Change Main Menu
After clicking change menu, you should now be presented with a selection of all menus - including the recently created menu. Select the new menu, click add, and then click save.
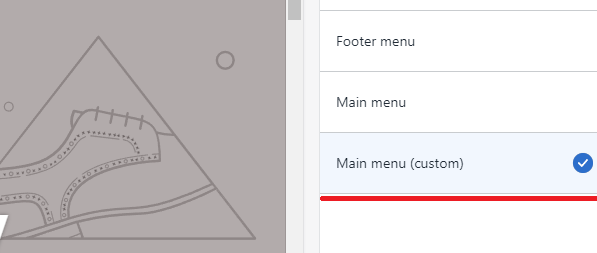
Theme View
At this point your changes will live sync to the theme view.
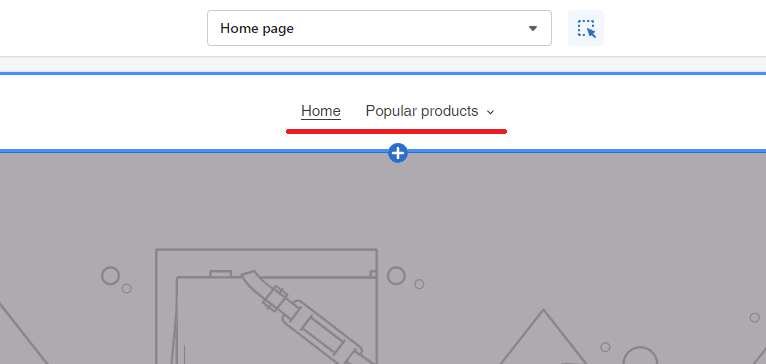
Confirm
As always, we encourage the process of confirming changes are working as expected. Go to your store front, and confirm all changes are now live.

It's worth noting, that you could edit the current live main menu to include a drop-down menu item without the need to create a whole new main menu. The purpose of this guide is to demonstrate an end-to-end solution.
The Takeaway
Focus on the simple things to make a huge impact. Adding a drop-down menu in Shopify is easy, but always factor in the user journey. I.E how easy is it to get from “A” to “B”?
Always ensure you’ve followed best practices to maximize your chances of securing that all-important sale. Every tweak you make to your store needs to be validated.
To summarize we've briefly covered:
- How to create a drop-down menu in Shopify
- How to replace the main menu in Shopify
What next:
- Learn how to increase Shopify traffic
- Best free Shopify apps
- Learn why you have Shopify traffic but no sales
- Check out the Best Shopify apps for SEO
- Share this post, every little helps.
- Subscribe to our newsletter below for tips and tricks to help boost sales.
Additional Shopify Resources
With Shopify being one of the largest eCommerce platforms on the market means you’ll never be short of resources to learn how to build a profitable eCommerce business.
Kanteneo aims to be the best Shopify blog on the market, but you may require additional resources to help you on that journey. Below we’ve listed a top-selling Shopify book by Veronica Jeans to help you learn how to launch a profitable business.
