How to Upload Sitemap in Shopify
Strictly speaking, you’re not uploading a sitemap in Shopify, the question really is, where to find the Shopify sitemap, and where to upload it.
Shopify's backend does all the heavy lifting, so really you just need to find the URL, and add it to the Google search console.
Below we’ll briefly cover: what is a sitemap, when you should submit the Shopify sitemap, and where to find and upload it.
1, What Is a Sitemap
A sitemap is the structure, the blueprint of your Shopify store, and its purpose is to help search engines, crawl, and index all of your pages.
2, When Should You Submit a Shopify Sitemap
There is no hard-fast rule here, but one would assume that if you submit a sitemap, and your store is still in development with password-protection, then any indexed page will be temporarily redirected(302) to the password-protected page.
A 302 status code simply means that the requested page was found but it is temporarily being redirected to a new page(password-protected page).
Whilst this does not pose a significant threat to indexed pages whilst in development, it’s always a good idea to give search engines(crawlers) a clean slate. - Configure the sitemap just before you plan to remove password protection
An example:
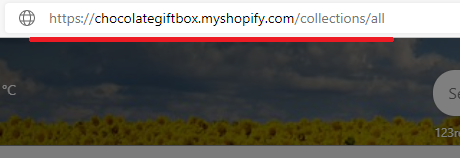
Add the URL of a locked page in the address bar.
Viewing the response.
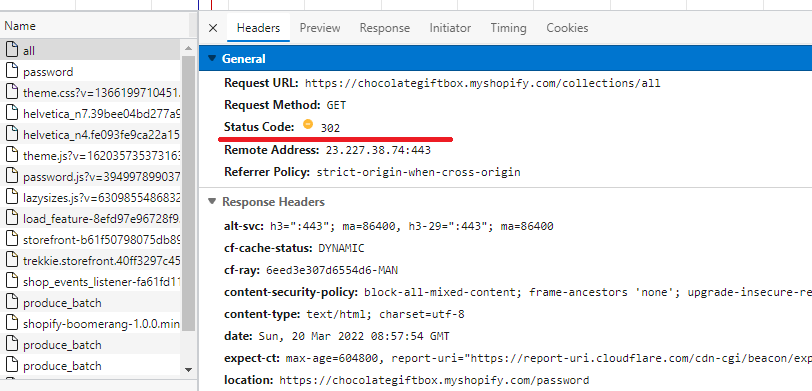
As started above, it's too insignificant to care about whilst in development, but an understanding of what's happening under the hood is always beneficial.
3, Where to Find Your Shopify sitemap
Sitemap URL
Most major platforms, developers, and SEO specialists will actively adhere to common patterns, thus the sitemap will always be found in the root of a project/solution, and this is no different to Shopify.
Naviagte to your store with the following url structure: https://{your-store-name}.myshopify.com/sitemap.xml
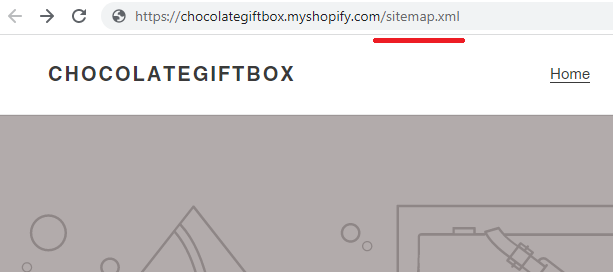
The Sitemap
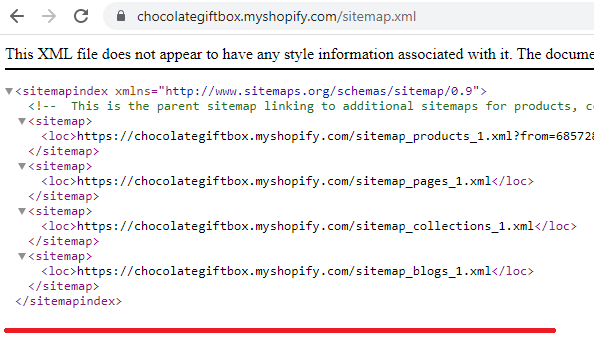
After completing the step above, you should be seeing results similar to the image below - If you do, great!! You have a sitemap!
Read on to find the physical steps to add your sitemap to Google search console.
4, Where Should You Submit a Shopify Sitemap
In all reality, you know the answer to this, Google! But don’t neglect other engines, especially Bing, and potentially Yahoo.
Google's current market share hovers around 80 - 85 percent, thus being the dominant force, with Bing around 5 - 7 percent, and Yahoo at around 2 percent, the rest being negligible.
- Source: Statista
From the above figures, it’s fair to say, your first port of call is Google. If you don’t have a Google search console account, go and create it: https://search.google.com/search-console/about
After you've created a Google search console account follow the steps below.
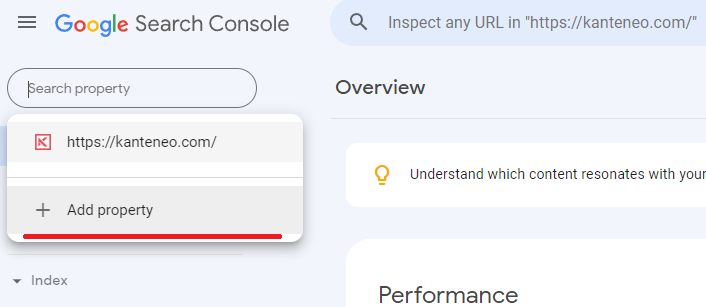
Step 1: Add Property
Find the "add property" button and create a new property.
Step 2: Property Type
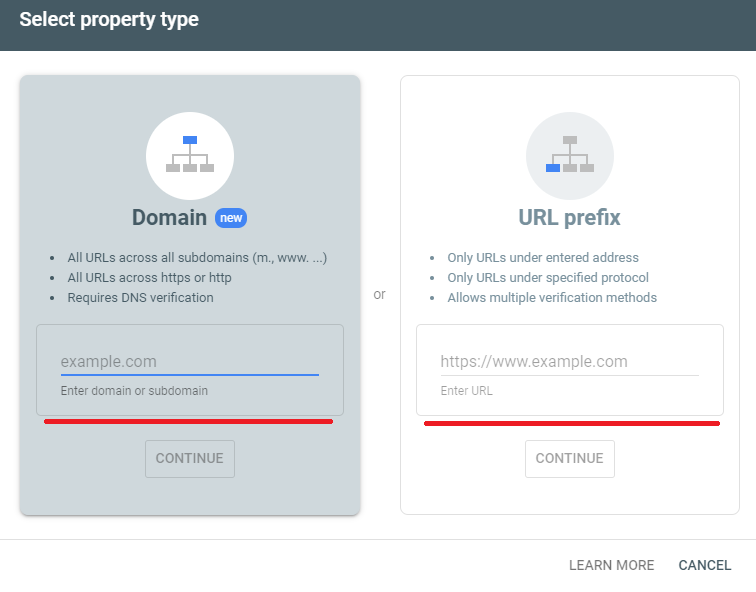
On the first step of the wizard you'll be prompted with two options: "Domain" and "URL prefix".
The domain method involves adding a DNS record (TXT) to your domain.
The URL prefix method contains multple methods to verify - two of those options are adding a meta tag, and adding a verification file.
In this example we'll opt for "URL prefix" - add your domain and click "continue"
Step 3: Verification Method
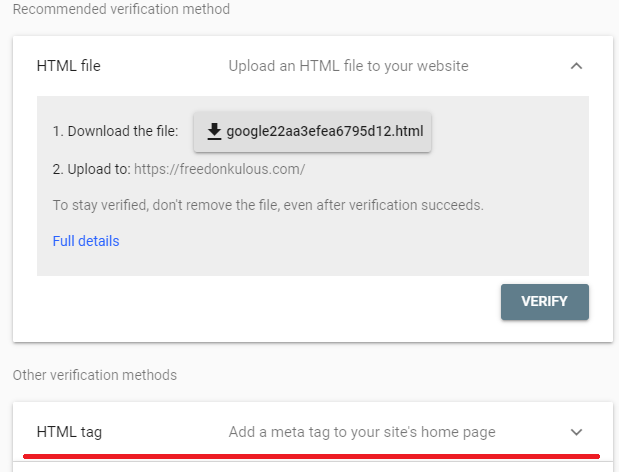
Locate the "HTML tag" dropdown and click.
Step 4: HTML Tag
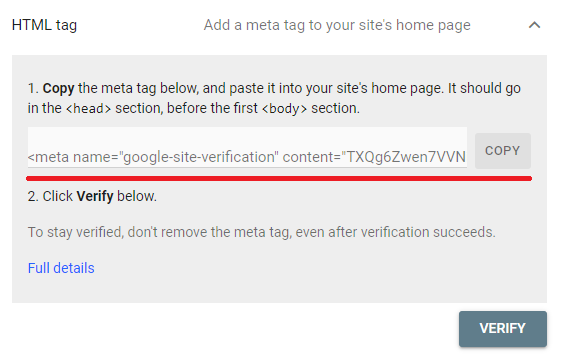
Copy the HTML tag - don't click "verify" just yet.
Step 5: Online Store
After copying the HTML tag, go to your Shopify store and click "online store".
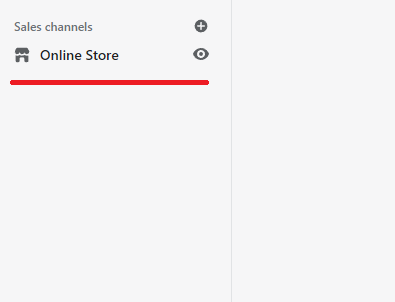
Step 6: Actions Button
Click the "actions" button
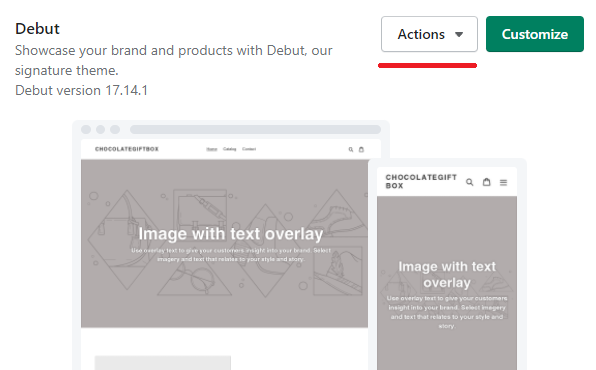
Step 7: Edit Code
Now click the "edit code" button in the "actions" dropdown.
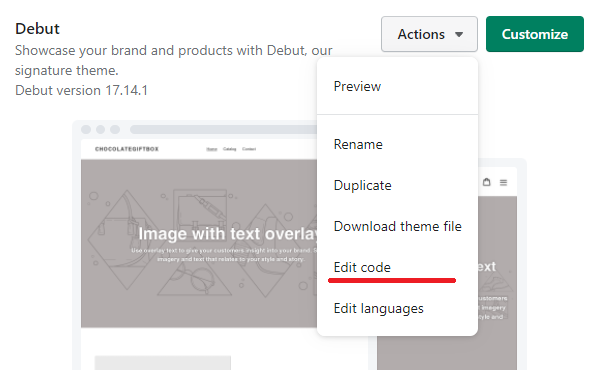
Step 8: Theme Liquid File
Find and click the "theme.liquid" file under the "Layout" folder.
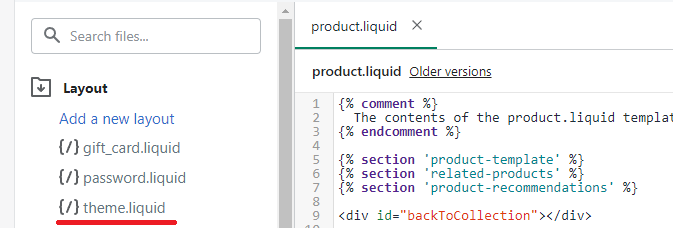
Step 9: Edit theme.liquid
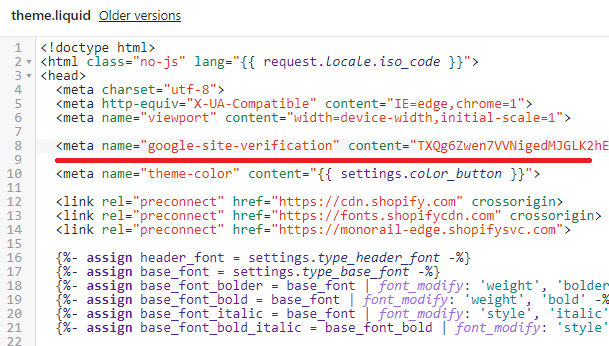
In the "head" section of the code file you'll need to paste the verfication HTML tag you copied in step 4
Don't forget to save!
Step 10: Verify
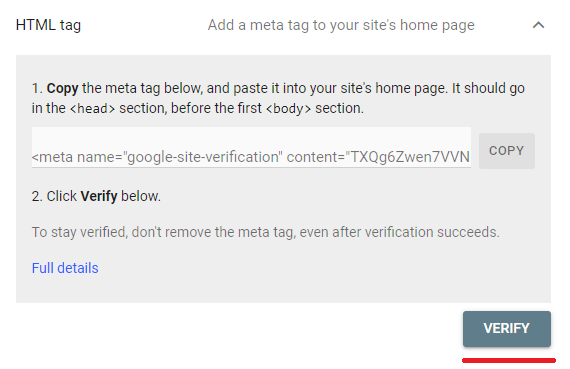
Now go back to the Google search console and click "verify".
Allow a few minutes for the saved changes in Shopify to be detected when clicking verify.
Step 11: Sitemaps Button
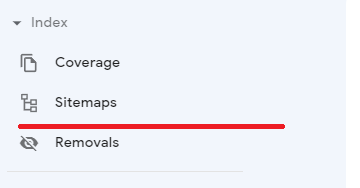
Once sitemaps has been verified, go back to the homepage of the search console and click "sitemaps".
Step 12: Add The Sitemap URL
Here you don't need to add the full url, just the filename and the extension. I.E sitemap.xml
Add "sitemap.xml" and click submit.

Congratulations!! Google will now be able to crawl your shopify store more effectively and notably faster.
The Takeaway
Search engines need to understand your store's structure for better crawling and indexing, and whilst it’s quite possible to crawl and index a website without a sitemap, we want to make it easier and quicker for search engines.
To summarize we've briefly covered:
- What Is a Sitemap
- When should you submit a Shopify Sitemap
- Where to find your Shopify Sitemap
- Where should you submit a Shopify sitemap
What next:
- Learn how to increase Shopify traffic
- Learn how to add a product to shopify that sells
- Shopify traffic but no sales? 14+ conversion tactics to try
- Learn how to blog for business to build trust and authority
- Share this post, every little helps.
- Subscribe to our newsletter below for tips and tricks to help boost sales.
Additional Shopify Resources
With Shopify being one of the largest eCommerce platforms on the market means you’ll never be short of resources to learn how to build a profitable eCommerce business.
Kanteneo aims to be the best Shopify blog on the market, but you may require additional resources to help you on that journey. Below we’ve listed a top-selling Shopify book by Veronica Jeans to help you learn how to launch a profitable business.


